LocostUSA.com

Learning how to build Lotus Seven replicas...together!
It is currently April 19, 2024, 12:09 am

All times are UTC - 5 hours [ DST ]


Post new topic Reply to topic  [ 121 posts ]  Go to page Previous  1, 2, 3, 4, 5, 6 ... 9  Next
Author Message
PostPosted: January 24, 2015, 6:22 pm 
Offline

Joined: January 24, 2015, 5:17 pm
Posts: 4
Hi LongIsland Locost

I'm in Rocky Point LI, and am thinking of starting a BEC 7 this spring. Moved here 6 mos. ago so I'm still setting up my shop (30 years of tool collecting in the previous house). I'm an old hotrodder from the 60s (68 Firebird 400, 56 302 Vette) and ran at National Speedway. Raced karts as a kid, and again with my son in the 80s. I thought I'd build something between the two and a Locost seems about right.

Looks like you've gotten a great start on your build, and I'll be following with interest.

I'll let you know when I get my act together here and start my build log.

Good luck with the build,

Rich


Top
 Profile  
Reply with quote  
PostPosted: February 8, 2015, 10:46 pm 
Offline

Joined: August 25, 2014, 8:41 pm
Posts: 68
Location: Long Island, NY
Hey Rich!,

It looks like we are the closest Locosters! We absolutely need to get our heads together as we move along with our projects. Please share your project ideas here.

I too was/am a muscle car guy! Here are a few from the past;

(2) 1971 GTX 440 and 440+6
(3) 1971 Roadrunner (2) 440+6 and 383
1966 Belvedere 440 4spd
1967 GTX convertible 440 auto
1972 Jensen Interceptor 440 auto
1971 Ranchero 429 SCJ 4spd
1968, 76, 77 Bronco's
1974 MGB
1990 Mustang LX 5.0 convertible
1990 SHO Taurus
1986 Thunderbird TurboCoupe (only new car I ever bought!)

I know there were a few more in there!

Currently my daily driver is a Sonic Blue 2004 SVT Focus (most fun car I've ever had! I smile every time I row through the gears!)
I also have a 1995 F250 7.3 Powerstroke, and the 1995 SVT Cobra Mustang I'm going to sacrifice for the Locost.


Top
 Profile  
Reply with quote  
PostPosted: February 8, 2015, 11:08 pm 
Offline

Joined: August 25, 2014, 8:41 pm
Posts: 68
Location: Long Island, NY
I'm moving along with the project! Table is done and reference drawings are on it. I'll probably pickup my steel this week;

(10) 1 1/4" square tube x 16ga x 24ft ASTM A500 Gr B $30.00ea.

ASTM A500 is a standard specification for cold-formed welded and seamless carbon steel structural tubing.


Carbon, Max % = 0.260
Manganese, Max % = 1.350
Phosphorus, Max % = 0.035
Sulphur, Max % = 0.035
Copper, Max % = 0.200 (The minimum copper content is optional, I'm not sure how much copper will be in my tubing)

Tensile Strength, Min psi = 58,000
Yield Strength, Min psi = 46,000ASTM

A501, which is a hot-formed version of this A500, is another choice I've seen Locost builders use, however many have recommended A500 because it has less scale and possibly less contaminants on it. This "cleaner" alloy may be easier to prep when welding. In some case the A500 is also a bit more stiff due to the cold working during tube forming.

This quote is from MetalMasters in Ronkonkoma; a bit high compared to what I saw someone recently pay in Texas, however much lower than the $65 another local vendor quoted......yikes!!!


Top
 Profile  
Reply with quote  
PostPosted: February 8, 2015, 11:11 pm 
Offline

Joined: August 25, 2014, 8:41 pm
Posts: 68
Location: Long Island, NY
Here's my table and build so far;

Image

Image


Top
 Profile  
Reply with quote  
PostPosted: February 9, 2015, 3:14 am 
Offline
The voice of reason
User avatar

Joined: January 10, 2008, 4:47 pm
Posts: 7652
Location: Massachusetts
Quote:
I'm in Rocky Point LI,


Too bad for you guys they closed the Bridgehampton race track. It was a fun track and had some real history.

The square tube I bought from OnlineMetals was ASTM 513. I think the yield was just a little bit higher but would have to track down the paper work. It's $17 for 8' and then you have to add shipping. I think you're getting a good deal. THe hot roll probably has a lower yield and you don't want that.

Glad to see you getting going. It will be spring any day now :rofl:

_________________
Marcus Barrow - Car9 an open design community supported sports car for home builders!
SketchUp collection for LocostUSA: "Dream it, Build it, Drive it!"
Car9 Roadster information - models, drawings, resources etc.


Top
 Profile  
Reply with quote  
PostPosted: February 9, 2015, 6:53 am 
Offline
We are Slotus!
User avatar

Joined: October 6, 2009, 9:29 am
Posts: 7651
Location: Tallahassee, FL (The Center of the Known Universe)
Yo!
I see you once owned and MGB, so you must be an all right kind of guy. Yep, that decides it. You can stay. :mrgreen:

Good to see some progress. Nice looking table. Keep us posted on the steel's arrival and that all important "first cut."
:cheers:
JDK
Attachment:
Crow Mtn 08.jpg


You do not have the required permissions to view the files attached to this post.

_________________
JD, father of Quinn, Son of a... Build Log
Quinn the Slotus:Ford 302 Powered, Mallock-Inspired, Tube Frame, Hillclimb Special
"Gonzo and friends: Last night must have been quite a night. Camelot moments, mechanical marvels, Rustoleum launches, flying squirrels, fru-fru tea cuppers, V8 envy, Ensure catch cans -- and it wasn't even a full moon." -- SeattleTom


Top
 Profile  
Reply with quote  
PostPosted: February 13, 2015, 5:56 pm 
Offline

Joined: August 25, 2014, 8:41 pm
Posts: 68
Location: Long Island, NY
As I'm moving forward I'm thinking more and more about the suspension challenges ahead.

SN95 spindles- I plan on using mine and am wondering what everyone's thoughts are on Whitby verses Griggs SLA adaptors;

http://www.griggsracing.com/product_inf ... cts_id=272


http://www.whitbymotorsports.com/UInvDe ... oryid=1604


The Whitby parts look nicer and they are lighter.

The Griggs look stronger, steel construction and attached with 3 bolts instead of 2.

Both seem to have about the same ball joint geometry/location.

As for the 8.8" Mustang rear, I'm favoring a 4 bar system with ~30" links and a Watts or Mumford setup. I know that it will be a bit of a challenge to squeeze in the links between the chassis and the tires. With a 46" wide 442E chassis being 46" and me having about 49" between the 275-40-17 tires I'll most likely have to use 1" wheel spacers on the axle.

Yeah, not ideal, but I love those big tires and the Cobra wheels.


Top
 Profile  
Reply with quote  
PostPosted: February 14, 2015, 12:05 am 
Offline
User avatar

Joined: October 24, 2008, 2:13 pm
Posts: 5326
Location: Carlsbad, California, USA
I'm using the Whitby adapters on my 1994 SN95 spindles. The upper angle stock shown in the Whitby website (kit) photo, along with the accompanying bolts for them are not needed for a Locost. They are for the Factory Five Cobra kit. They will sell you the lower pieces (2 adapters, bolts, washers and lock nuts) shown in the lower half of the photo, separately. That reduces the cost a little bit. You can look through my build log and get the prices I paid a couple of years ago.

The Whitby adapters have been used a lot on the Cobras in street and racing applications, so are well tested. There is however, no specific engineering data (like true SAI angle with the Chrysler upper ball joints and FFR lowers installed, distance between ball joint centers, etc.) and you'll need to figure that out. Or, wait until I do it with Chrysler screw-ins at top and bottom, which should be within 2 weeks or so.

I have preliminary figures now based on a lower ball joint I'm going to replace (parts on order), so mine aren't final yet. The SAI is right around 9 degrees, from recollection. If you use different ball joints (at top or bottom or both) your figures for distances likely would be different than mine - perhaps enough to make a difference.

Griggs is an excellent outfit and I have nothing negative to say about their product at all. They've been racing Mustangs for a long time with great success. As I recall now, their product then (circa 2011?), which I did look at, had a much higher SAI (13-14 degrees?) and I felt the scrub radius would be too large. I may have commented about that in my build log. The Griggs product you see now may be different than the one I looked at back then. It might be worthwhile to ask.

Both company's adapters use two bolts. That "enlarge" photo on the Griggs website is incorrect, I believe. Both products replace the stock Mustang strut which has two bolts securing it. The main product photo for the Griggs site is correct.

Cheers,

_________________
Damn! That front slip angle is way too large and the Ackerman is just a muddle.

Build Log: viewtopic.php?f=35&t=5886


Top
 Profile  
Reply with quote  
PostPosted: February 14, 2015, 12:05 pm 
Offline

Joined: August 25, 2014, 8:41 pm
Posts: 68
Location: Long Island, NY
Lonnie Lonnie Lonnie! You are my Valentine today, in thanks for all your hard work that I am busy "stealing with both hands"! :cheers: :D I'm about 1/3 of the way through in regards to reading your build log and sidebar discussions. There's a lot to absorb!

Yeah, I had difficulty figuring out the two verses three bolt deal and I'm happy you cleared it up. I'll go with the Whitby and then let you figure it out for me....thanks again! :P

I'm about a year behind you, but should hopefully move faster with you as my research partner. My issue more than anything is time. I travel for work and I have some long term projects coming up in Nigeria, China, and Saudi Arabia. However when I'm not traveling, I domwork from home and can play hooky to weld tubes. Damn cold in New York now too; not good timing for hacking apart the SN95!

If you want to BS on the phone some time send me a private message.


Top
 Profile  
Reply with quote  
PostPosted: February 14, 2015, 2:10 pm 
Offline
The voice of reason
User avatar

Joined: January 10, 2008, 4:47 pm
Posts: 7652
Location: Massachusetts
Quote:
With a 46" wide 442E chassis being 46" and me having about 49" between the 275-40-17 tires I'll most likely have to use 1" wheel spacers on the axle.


Depending on how much room you need (big guy, wide shoulders etc. ) consider building the 44" or 45" wide. I don't remember the Locost frame details but you may also be able to move the vertical tube at the rear of the cockpit to the inside of the frame rail instead of the back?

_________________
Marcus Barrow - Car9 an open design community supported sports car for home builders!
SketchUp collection for LocostUSA: "Dream it, Build it, Drive it!"
Car9 Roadster information - models, drawings, resources etc.


Top
 Profile  
Reply with quote  
PostPosted: February 14, 2015, 8:16 pm 
Offline
User avatar

Joined: October 24, 2008, 2:13 pm
Posts: 5326
Location: Carlsbad, California, USA
horizenjob wrote:
Quote:
With a 46" wide 442E chassis being 46" and me having about 49" between the 275-40-17 tires I'll most likely have to use 1" wheel spacers on the axle.


Depending on how much room you need (big guy, wide shoulders etc. ) consider building the 44" or 45" wide. I don't remember the Locost frame details but you may also be able to move the vertical tube at the rear of the cockpit to the inside of the frame rail instead of the back?


If you're using those nice stock wheels and need to move them out, spacers will do it. If you end up ordering new wheels, use a company that lets you select the backspacing for them. It's just a cleaner solution and usually costs nothing. That's what I did.

Cheers,

_________________
Damn! That front slip angle is way too large and the Ackerman is just a muddle.

Build Log: viewtopic.php?f=35&t=5886


Top
 Profile  
Reply with quote  
PostPosted: February 14, 2015, 11:42 pm 
Offline
We are Slotus!
User avatar

Joined: October 6, 2009, 9:29 am
Posts: 7651
Location: Tallahassee, FL (The Center of the Known Universe)
Yo, Long Island!
If you go with 1" spacers as discussed, you might have to use longer wheel studs as well. You want to have all the lug-nut-to-wheel-stud thread contact you can get, and hopefully some threaded stud extending out past the lug nuts. I'm using 1/4 spacers on the rear of the Slotus, just so the calipers will clear the (aftermarket) wheels. With that skinny spacer, the lugs are fully threaded, but not much extra. YMMV, but just be aware if you go with spacers and check the length of the studs, ya know?

:cheers:
JD

_________________
JD, father of Quinn, Son of a... Build Log
Quinn the Slotus:Ford 302 Powered, Mallock-Inspired, Tube Frame, Hillclimb Special
"Gonzo and friends: Last night must have been quite a night. Camelot moments, mechanical marvels, Rustoleum launches, flying squirrels, fru-fru tea cuppers, V8 envy, Ensure catch cans -- and it wasn't even a full moon." -- SeattleTom


Top
 Profile  
Reply with quote  
PostPosted: February 16, 2015, 2:30 am 
Offline

Joined: August 25, 2014, 8:41 pm
Posts: 68
Location: Long Island, NY
Thanks all!

I've studied a few ways to mount the long links and I'm sketching up some ideas I'll share soon.

I'm not too keen on long stud type spacers; I'd used bolt on ones similar to these:

http://www.americanmuscle.com/h-r-spacers-25mm.html they can be found in the $70 range

Of course, the right thing to do would be wheels with more offset, but in the Locost spirt I'll try to stick with the donor wheels for now.


Top
 Profile  
Reply with quote  
PostPosted: October 16, 2015, 6:51 am 
Offline

Joined: August 25, 2014, 8:41 pm
Posts: 68
Location: Long Island, NY
Well, it's been about 6 months since I cut my first 1.25" square tube and I figure I am about due to post an update here! Thanks to so much to Lonnie who wrote me back regarding a few things and a big shout out to Jack McCornack at kinetic. Jack has come though with some great advice and some great parts. I'm buying all I can from him due to his great support here and personally.

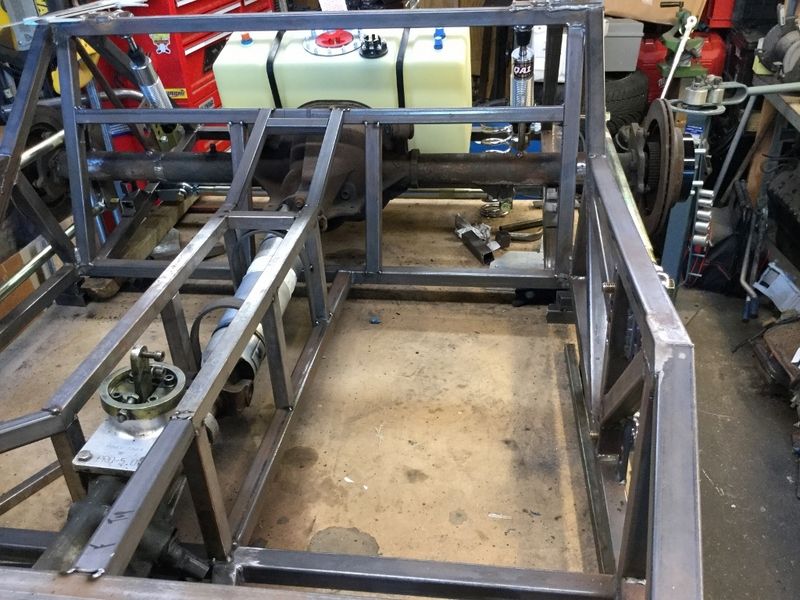
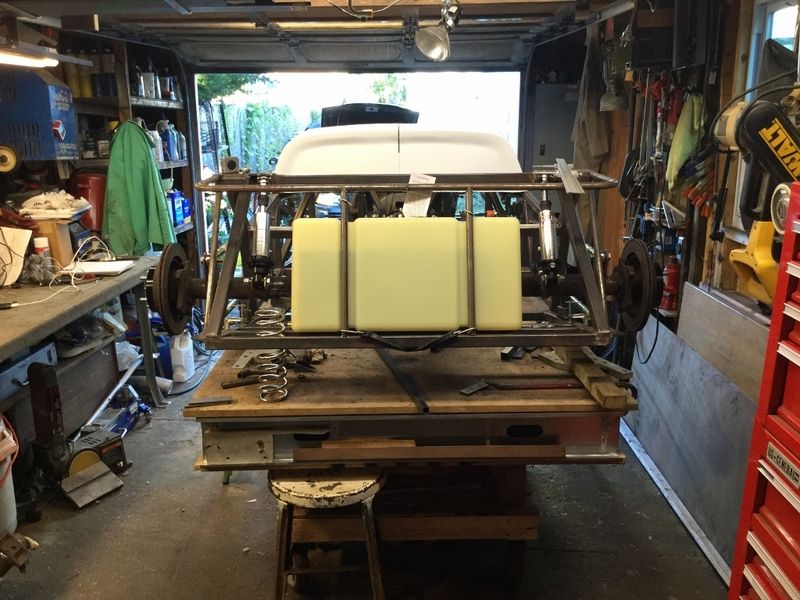
My table has worked out great; still super flat and sturdy. With it's big wheels I can roll it easily in and out of my garage (very helpful during the engine swap) and the industrial machine levelers on 4 corners make it easy to have a level table to work from.

Image

I went with the Griggs SN95 SLA adaptors; Bruce Griggs has been super helpful. I like that they are steel and that there are three bolts holding it to the SN95 spindle instead of only two bolts on other adaptors. I did need to ream out the lower ball joint holes with a 7 degree reamer for full taper engagement (thanks for the hard work researching this Lonnie!).

Image

Image

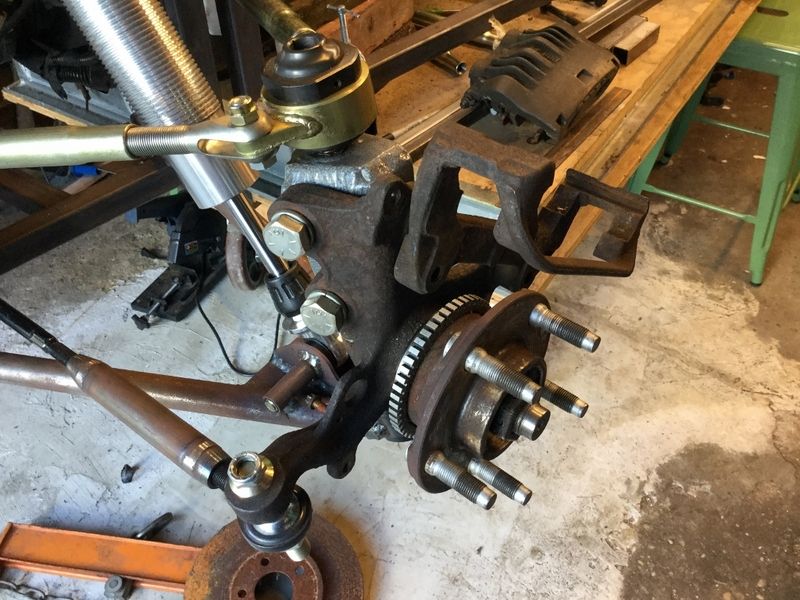
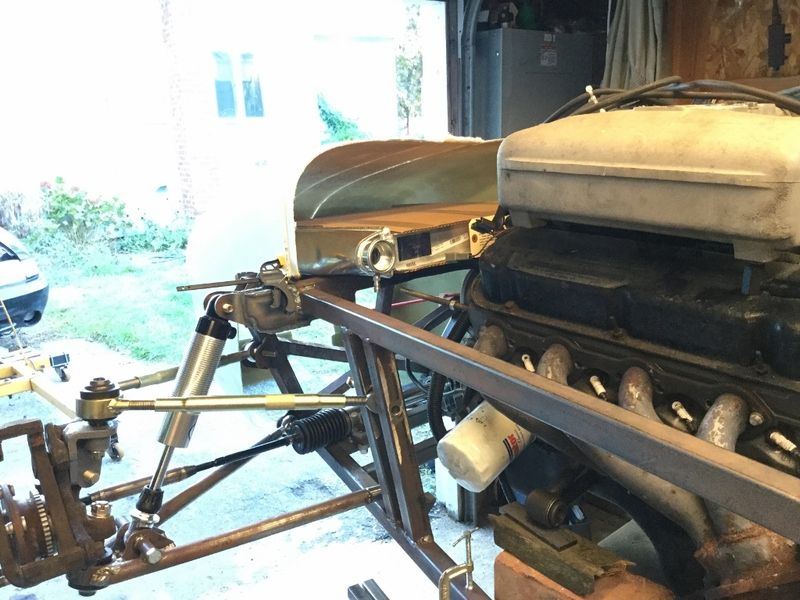
I really wanted to use the SVT Cobra's quick ratio steering rack, but in the end it was easier for me to buy a new 5" shortened Flaming River manual rack. Thus far my geometry looks good and bumpsteer has been pretty much adjusted to the best I can see with a long straightedge. I'll be setting up a laser to see where I'm really at when I return to the US in November.

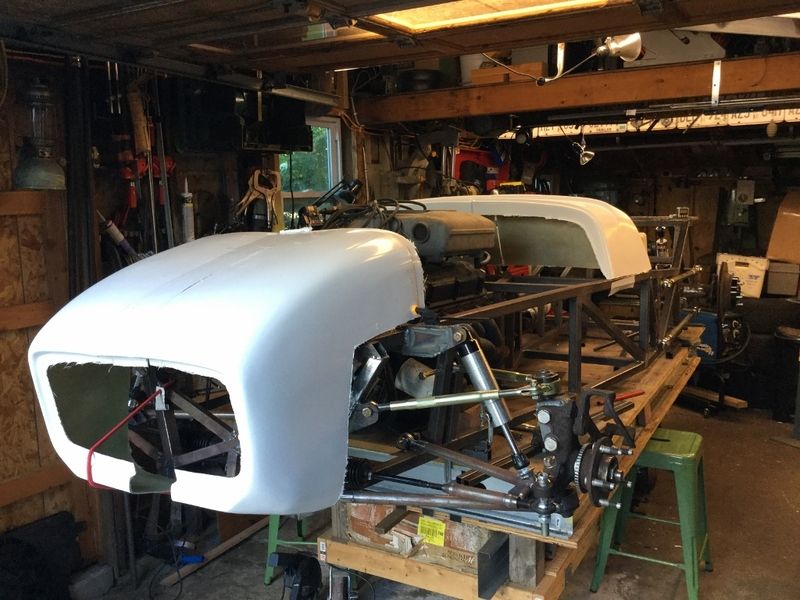
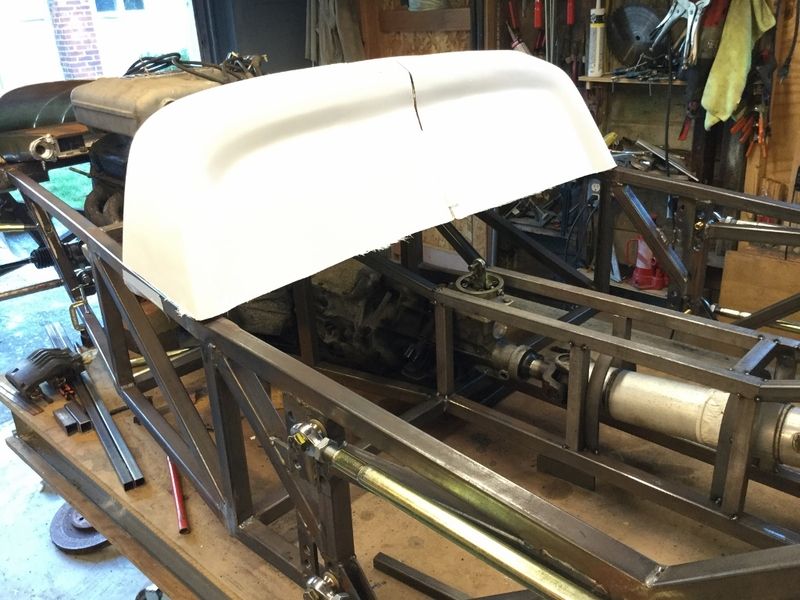
Note that some of the frame is fully welded, actually a LOT of the frame is fully welded, but the tunnel area and some of the suspension bits are just temporarily tacked in place until I figure out where other stuff goes.

I went with long links (~31") due to influence from Cheapracer. Look cool in my opinion and it's fun to be different. I will eventually mount the link bolts in double shear with a bracket (this is what the forward holes are for).

Image

Image


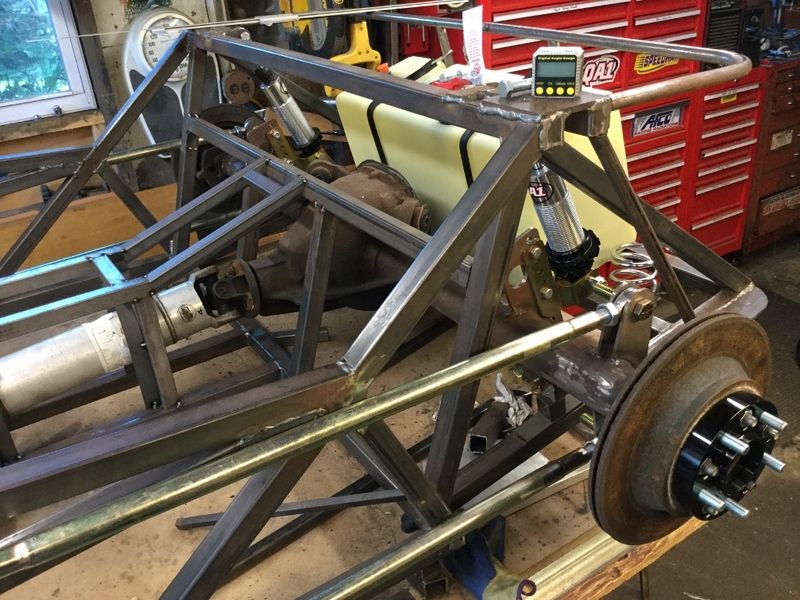
I also made a nice set of geared Cheapracer BEX link, but in testing I found that it allowed my axle to rotate a bit too much around the BEX center point. This is a great attribute for most, but for me with really big tires and tight body clearance I could see how my tires will rub the body at their tops. I made a long track bar instead and this seems to better suit my situation. If anyone needs a set of BEX links please let me know!

Image

I am using a 10 gallon JAZ cell from Jack and will mount the SVT Cobra fuel pump inside it.

Image

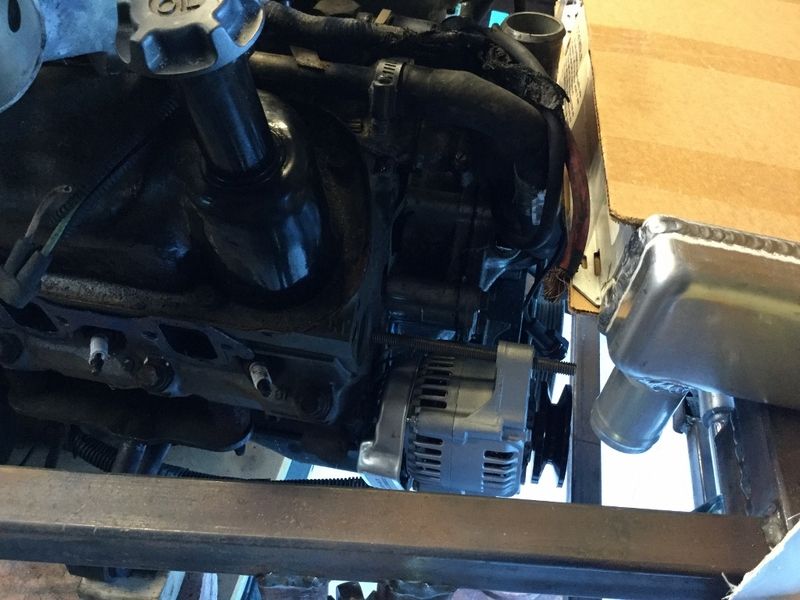
I also picked up a 70A Denso style alternator to help with the space around the engine.

Image

Luckily I drove the SVT Cobra before I took it apart and everything works great! Fresh "real" GT40 heads, ported along with the Cobra intake. E303 cam and 3.73 gears. Even with the big tires it would break them free at full throttle in 2nd gear. It has the original SVT T5 with phosphated gears and it shifts awesome! I'll be using a hydraulic throughout beating actuator to save some space in the tunnel and with some good planning I'll be able to fit some decent size pedals (11E shoes) and 18" Kirkey Pro Street drag seats.

I also plan on going the Megasquirt MS3-Pro route and use most of the Cobra hardware.

Because I travel out of the country for work 9 months out the year, I don't have much time to work on the car, but I do have time to plan, think, and order stuff on the internet!

Thanks to all others here on Locostusa! Your hard work and constant sharing of information has made this project possible for me. I cannot thank you all enough!


Top
 Profile  
Reply with quote  
PostPosted: October 21, 2015, 9:01 am 
Offline
User avatar

Joined: October 24, 2008, 2:13 pm
Posts: 5326
Location: Carlsbad, California, USA
Hey, your build is looking fan-tabulus and that's a good thing. I'll come back and take a detailed look tomorrow when I get home. It's clear you've done your homework and made maximum use of the good info others on this site have developed.

Cheers,

Lonnie

_________________
Damn! That front slip angle is way too large and the Ackerman is just a muddle.

Build Log: viewtopic.php?f=35&t=5886


Top
 Profile  
Reply with quote  
Display posts from previous:  Sort by  
Post new topic Reply to topic  [ 121 posts ]  Go to page Previous  1, 2, 3, 4, 5, 6 ... 9  Next

All times are UTC - 5 hours [ DST ]


Who is online

Users browsing this forum: No registered users and 53 guests


You cannot post new topics in this forum
You cannot reply to topics in this forum
You cannot edit your posts in this forum
You cannot delete your posts in this forum
You cannot post attachments in this forum

Jump to:  
POWERED_BY