LocostUSA.com

Learning how to build Lotus Seven replicas...together!
It is currently May 17, 2024, 2:58 am

All times are UTC - 5 hours [ DST ]


Post new topic Reply to topic  [ 486 posts ]  Go to page Previous  1, 2, 3, 4, 5, 6 ... 33  Next
Author Message
PostPosted: November 20, 2019, 10:12 pm 
Offline
User avatar

Joined: June 20, 2019, 12:34 pm
Posts: 592
Thanks Nick. I have gotten some very good responses on the MG web site already!

So today I decided to see how everything will fit. I first set the trans in roughly the right spot. Then I set the motor in. That showed me that I had a few points of conflict with motor, trans and frame. SO I juggled it all around until I had the motor level, no contact between the power train and the frame and item could be serviced in the future.

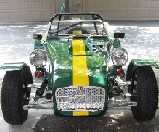
In answer to your comment about the frame design, as far as I can confirm, the builder started with a McSorley 442 design. The motor will be just about 1/2" above the bottom of the frame. The shifter is a bit too forward, but if I heat and bend back the shift handle (more like an Alfa) it will be perfect.

Attachment:
Shift handle.JPG


The valve cover will be above the engine cover. I played around with the scoop I had and if I turn it around, It will fit over the valve cover and exhaust out to the rear- I think this will actually aid in airflow out of the engine compartment. And I kind of like the look!

Attachment:
Scoop reversed.jpg


As far as the carbs, I am thinking more about converting to EFI now. It would clear the hood and if (as I am thinking now) I go from 8.0 compression to 8.5 compression, a upgraded cam and a little head work, I will be able to get a little better tuning available. The SU crbs w/o the pistons are about the same size as the EFI throttle bodies from Borla mounted on an intake set up for HS6 carbs. They are a bolt on for that manifold!

Attachment:
IMG_0649.JPG


Attachment:
IMG_0648.JPG


I am going to "steal" your motor mount design Nick, if I may. It looked plenty strong.

Thom


You do not have the required permissions to view the files attached to this post.

_________________
Thom


Top
 Profile  
Reply with quote  
PostPosted: November 21, 2019, 1:25 am 
Offline
User avatar

Joined: July 4, 2006, 5:40 pm
Posts: 1994
Location: Novato, CA
BostonWill wrote:
The shifter is a bit too forward, but if I heat and bend back the shift handle (more like an Alfa) it will be perfect.
Thom


Exactly what I did. Well, not exactly. I cut the shifter in two 2-3" above the pivot ball, beveled the ends, and welded it back together at a 20-degree angle. The angle isn't nearly as extreme as my dad's old Alfa, and I don't even think about it anymore.

BostonWill wrote:
I am going to "steal" your motor mount design Nick, if I may. It looked plenty strong.
Thom


They're probably overkill, but I wanted to be sure, and the motor mounts on the B-series engine are pretty high so the supports are quite tall. A couple of other MG-based Locosts are the Ken Walton and Martin Keller cars. Ken and Martin both got their engines to fit under the bonnet with much shorter motor mounts, but neither car has very good ground clearance, IMO.

BTW, I just got your email and you are more than welcome to check out the MG Locost when you're out this way.


Top
 Profile  
Reply with quote  
PostPosted: November 21, 2019, 1:46 pm 
Offline

Joined: December 29, 2007, 10:41 pm
Posts: 1008
Location: Vancouver, BC
My 2 cents, I'd stick with SU's until the car is fully sorted, though personally I'd try to find some HS4's rather than the HIFs. I would add all the needed fittings to the fuel tank, and if needed return lines for EFI, but still get the car mobile with the SU's.


Top
 Profile  
Reply with quote  
PostPosted: November 21, 2019, 2:22 pm 
Offline
User avatar

Joined: July 17, 2008, 9:11 am
Posts: 6419
Location: West Chicago,IL
cs3tcr wrote:
My 2 cents, I'd stick with SU's until the car is fully sorted, though personally I'd try to find some HS4's rather than the HIFs. I would add all the needed fittings to the fuel tank, and if needed return lines for EFI, but still get the car mobile with the SU's.


I agree 100%. Who knows, you may even like the SU's. That is, unless you like challenges. I went standalone EFI. But that was on an EFI equipped engine. It was educational, which was one of my goals. I would do it again. But it wasn't the quickest way to an end.

_________________
Chuck.

“Any suspension will work if you don’t let it.” - Colin Chapman

Visit my ongoing MGB Rustoration log: over HERE

Or my Wankel powered Locost log : over HERE

And don't forget my Cushman Truckster resto Locostusa.com/forums/viewtopic.php?f=36&t=17766


Top
 Profile  
Reply with quote  
PostPosted: November 21, 2019, 9:31 pm 
Offline
User avatar

Joined: June 20, 2019, 12:34 pm
Posts: 592
cs3tcr & rx7locost, thanks for the feedback. Good input. Sometimes (just ask my wife) I get a little carried away.

I was online early this morning trying to see what I might use to try to free up the stuck motor (found it at Autozone). I ended up tripping across an add for a product called "Metal Rescue".

https://www.youtube.com/watch?v=BWMK0v1GI3A

It is non toxic and supposedly safe to even dip your hands in. I covered each piston up over the dish and about 1/4" above the top of the piston. I need to wait till tomorrow when Grainger gets my 1 5/16" impact socket for me so I can try, with a breaker first, to turn over the motor. I can testify that the rust on the cylinder walls above the piston top has almost disappeared almost entirely!

If this frees up the motor without gouging the cylinders further, I will be extremely happy.

I removed the motor and trans from the frame so I can start prepping them for service/rebuild. When I got the trans on an engine stand and tried to shift it, I noticed I could not get the trans in anything but 3 rd, 4th & reverse, Nor couple I get the trans to uncoupled it neutral. So I popped the shifter housing off the top of the trans and cleaned/lubricated the shift rod. Everything else in the dogs looked good.

I reassembled the shifter housing and proceeded to work the shifter back and forth while turning by hand the input shaft. After a bit of this exercise the trans finally started to change gears as it should. I suspect it needed to get some lubrication up onto the gear dogs so everything would start to freely move. Now it seems to shift smoothly. I checked the gear oil ( the MGB trans has a dipstick on the side to check the oil level- after all, all UK mechanics leak oil. it is how they do rust protection) and the oil looks like new, I will change it prior to running it in the car.

Will keep you all posted.

Thom

_________________
Thom


Top
 Profile  
Reply with quote  
PostPosted: November 22, 2019, 12:53 pm 
Offline
Automotive Encyclopedia
User avatar

Joined: December 22, 2006, 2:05 pm
Posts: 8051
I'd try rotating the crank backward to bring the piston down and expose the rust you can then remove without gouging the bore so much.

On the engine height issue, I'd raise the nose/bonnet/cowl 2-3 inches by adding a tube down each side before wrapping the sides. Probably make it easier on the knees/shins to get in and out of too with a higher cowl lower edge. I think square would have been a better choice for the rail. A 16ga 1x3, 1x2, or for less weight, a 1x1 with spacer strips staggered on each side would work well and be covered up by the skin.

_________________
Miata UBJ: ES-2074R('70s maz pickup)
Ford IFS viewtopic.php?f=5&t=13225&p=134742
Simple Spring select viewtopic.php?f=5&t=11815
LxWxHt
360LA 442E: 134.5x46x15
Lotus7:115x39x7.25
Tiger Avon:114x40x13.3-12.6
Champion/Book:114x42x11
Gibbs/Haynes:122x42x14
VoDou:113x44x14
McSorley 442:122x46x14
Collins 241:127x46x12


Top
 Profile  
Reply with quote  
PostPosted: November 22, 2019, 12:56 pm 
Offline
We are Slotus!
User avatar

Joined: October 6, 2009, 9:29 am
Posts: 7651
Location: Tallahassee, FL (The Center of the Known Universe)
Quote:
I checked the gear oil ( the MGB trans has a dipstick
And iffen I remember correctly, it doesn't actually use "gear oil" in the traditional sense. Factory recommended 30wt motor oil. Seems like there was a Redline synthetic product I used in mine, later on in life. I don't remember what the Redline stuff was called, but for now, I'd suggest the 30wt. Actually, I'd suggest you check that memory about the 30wt oil, 'cause I've slept since then and might have gotten corn-fused. :shock:

:cheers:
JDK

_________________
JD, father of Quinn, Son of a... Build Log
Quinn the Slotus:Ford 302 Powered, Mallock-Inspired, Tube Frame, Hillclimb Special
"Gonzo and friends: Last night must have been quite a night. Camelot moments, mechanical marvels, Rustoleum launches, flying squirrels, fru-fru tea cuppers, V8 envy, Ensure catch cans -- and it wasn't even a full moon." -- SeattleTom


Top
 Profile  
Reply with quote  
PostPosted: November 22, 2019, 10:04 pm 
Offline
User avatar

Joined: June 20, 2019, 12:34 pm
Posts: 592
Update, The solution did not free up the frozen pistons as hoped. So i have disassembled the rest of the motor. I removed the cam, lifters, oil pump internals, front and rear motor plates (the MG motor has a plate on booth ends that not only supply the mount points for motor mounting and bell housing attachment, but the rear seal as well). I carefully removed the rod end caps & main caps. While disassembly, I inspected the bearings, all but the front main bearing were in pretty good condition. The front bearing was showing some "brass" but no gouging.

I re-installed the rod caps and gave a couple of hits on the end of the rods and then on the top of the pistons- no movement! D#27M!

So I sprayed in some rust remover to the bottom of the pistons with the motor inverted on the stand and will let it soak overnight. May the Gods of Valhalla take pity on me and free up so I can remove them.

Even the water jackets in the block are "like new", no corrosion. And the crank looks very good. This weekend I will get around to mic the crank to get an idea if it will need turning or not. The lifters showed some signs of corrosion on the flats. But I will replace them along with the cam anyway. And the crank end play seems to be in spec.

I saw no signs of head gasket leaking nor water in the pan. I think it was long term exposure of the open ports to the unconditioned storage space that allowed enough moisture to form and freeze the rings to the cylinders.

I had this happen to a 73 Porsche 911T that had the same problem. It was one of the only few configs of the 911 engine that had steel cylinder liners instead of the other aluminum alloy. And after 7 years of sitting in the mid west in an unheated garage, I could not even hammer off the liners from the pistons. and no way to split the crank case until the liners are removed. The guy I sold the long block to said he had to cut the liners down the middle to get them off of the pistons- the rings were "welded" with rust to the steel liners. Hope I can get the pistons in my current block to come free, even if I need to re-bore the block. If it was not for the pistons frozen, I think it would have been fine. There is no excessive wear nor ridge at the top of the cylinders.

Thom

_________________
Thom


Top
 Profile  
Reply with quote  
PostPosted: November 22, 2019, 11:20 pm 
Offline
User avatar

Joined: July 17, 2008, 9:11 am
Posts: 6419
Location: West Chicago,IL
Have you tried soaking with a 50/50 mix of automatic trans fluid and acetone? Supposed to be better than even PB Blaster. Might be worth a try. Cover the cylinder s to limit the acetone evaporation.

_________________
Chuck.

“Any suspension will work if you don’t let it.” - Colin Chapman

Visit my ongoing MGB Rustoration log: over HERE

Or my Wankel powered Locost log : over HERE

And don't forget my Cushman Truckster resto Locostusa.com/forums/viewtopic.php?f=36&t=17766


Top
 Profile  
Reply with quote  
PostPosted: November 22, 2019, 11:33 pm 
Offline
User avatar

Joined: December 4, 2011, 6:19 pm
Posts: 830
And remember to use heat. There aren't many things that don't come apart better with lots of heat.

_________________
Bill H
Winnipeg, MB, Canada


Top
 Profile  
Reply with quote  
PostPosted: November 24, 2019, 1:18 pm 
Offline
User avatar

Joined: October 24, 2008, 2:13 pm
Posts: 5326
Location: Carlsbad, California, USA
I hope I'm stating the obvious here, but just in case you're not used to acetone, don't use a heat source and acetone in combination. Acetone is scary volatile.

Cheers,

_________________
Damn! That front slip angle is way too large and the Ackerman is just a muddle.

Build Log: viewtopic.php?f=35&t=5886


Top
 Profile  
Reply with quote  
PostPosted: November 24, 2019, 2:36 pm 
Offline
User avatar

Joined: June 20, 2019, 12:34 pm
Posts: 592
All good suggestions. I think at this point I am just going let the machine shop get the piston assembles out of the cylinders. Let them "do the damage" in their shop. Everything else is torn down.

My wife walked by the parts spread out on the cart and said "can't believe you know where all of these parts go and you'll get this back together". Just kept it to myself that I'll have the shop re-assemble it, LOL! :wink:

Thom

_________________
Thom


Top
 Profile  
Reply with quote  
PostPosted: November 25, 2019, 1:40 pm 
Offline
User avatar

Joined: June 20, 2019, 12:34 pm
Posts: 592
Today I re-visited the motor and its stuck pistons. I had inverted the motor on the engine stand and lubricated the cylinders from the bottom with a rust removal solution again. I let it soak for 2 days.

I got out a fiberglass handled hammer and my trusty sledge hammer, placed the foot end of the hammer onto the end of the rod(s) and began to give a "heavy" tap to the hammer with the sledge. To my surprise, they started to move! So I carefully continued untill all four pistons cleared the top of the block.

The cylinders look remarkably good! I think a min overbore will take care of the cylinders, could almost get away with just a good honing, but I will have them re-bored. The pistons did not look as good, The rings were pretty much toast with rust,

Attachment:
MGB Pistons.JPG


Spoke to the machine shop and he is looking at previous MGB builds they recently did to give me some options.

Thom


You do not have the required permissions to view the files attached to this post.

_________________
Thom


Top
 Profile  
Reply with quote  
PostPosted: November 25, 2019, 5:30 pm 
Offline
User avatar

Joined: March 3, 2006, 10:48 pm
Posts: 1593
Location: Shawnee, Ks
Wow! About time they finally came out. Now I don't have to bring my BFH tomorrow when I come over. Looking forward to meeting you, Russ

_________________
You meet the nicest people in a Locost Se7en.


Top
 Profile  
Reply with quote  
PostPosted: November 25, 2019, 5:56 pm 
Offline
We are Slotus!
User avatar

Joined: October 6, 2009, 9:29 am
Posts: 7651
Location: Tallahassee, FL (The Center of the Known Universe)
trialsmangasgas wrote:
Wow! About time they finally came out. Now I don't have to bring my BFH tomorrow when I come over.
I was wondering when the BFH references would show up. Knew it had to happen... :mrgreen:

:cheers:
JD "Hammer Time" Kemp

_________________
JD, father of Quinn, Son of a... Build Log
Quinn the Slotus:Ford 302 Powered, Mallock-Inspired, Tube Frame, Hillclimb Special
"Gonzo and friends: Last night must have been quite a night. Camelot moments, mechanical marvels, Rustoleum launches, flying squirrels, fru-fru tea cuppers, V8 envy, Ensure catch cans -- and it wasn't even a full moon." -- SeattleTom


Top
 Profile  
Reply with quote  
Display posts from previous:  Sort by  
Post new topic Reply to topic  [ 486 posts ]  Go to page Previous  1, 2, 3, 4, 5, 6 ... 33  Next

All times are UTC - 5 hours [ DST ]


Who is online

Users browsing this forum: No registered users and 21 guests


You cannot post new topics in this forum
You cannot reply to topics in this forum
You cannot edit your posts in this forum
You cannot delete your posts in this forum
You cannot post attachments in this forum

Jump to:  
POWERED_BY