LocostUSA.com

Learning how to build Lotus Seven replicas...together!
It is currently April 16, 2024, 1:18 am

All times are UTC - 5 hours [ DST ]


Post new topic Reply to topic  [ 111 posts ]  Go to page Previous  1 ... 3, 4, 5, 6, 7, 8  Next
Author Message
PostPosted: July 18, 2011, 8:21 am 
Offline
Man of Constant Hazard
User avatar

Joined: February 20, 2006, 11:18 am
Posts: 3186
Location: Lexington, KY
Can you pull it straight out the back? Or drop it back then down out the bottom?

_________________
...nowadays people are so intellectually lazy and lethargic that they can't build ANYTHING with their hands. They'll spend hours watching whiny people marooned on an island, but won't spend a second adding anything to the world. -weconway
Visit my [Locost 7 build log]


Top
 Profile  
Reply with quote  
PostPosted: July 18, 2011, 10:11 am 
Offline
User avatar

Joined: December 21, 2010, 11:01 pm
Posts: 191
Location: Sidney, NE
Geez dude, you have got some mad welding skills. Looks great!

Image

_________________
Cost to date: $---.--
Projected cost:$--,---.--
Expected completion: ------ ----


Top
 Profile  
Reply with quote  
PostPosted: July 19, 2011, 10:15 am 
Offline
Always Moore!
User avatar

Joined: November 9, 2007, 3:40 pm
Posts: 4075
Location: Pittsburgh, PA
Really nice looking fab work Emile. That rack turned out really well.

erturbo wrote:
As always I appreciate you keeping an eye on me ;-) I have intended to either fill the stock rubber bushing in the diff with some sort of poly resin or just replace them with an aluminum bushing.


I would definitely go for the aluminum bushings. Even with resin, there will still be some compliance in the stock ones.

For where you cut the frame, any chance you could make some fabricated "arch" of sorts from sheet that you could finagle the diff around while installing it?

_________________
-Andrew
Build Log
Youtube


Top
 Profile  
Reply with quote  
PostPosted: July 31, 2011, 1:06 pm 
Offline
Louisville's luckEseven Lauds Locosts
User avatar

Joined: December 21, 2006, 2:30 pm
Posts: 337
Location: Louisville, KY
Got a little bit more done this week. And... DRUM ROLL PLEASE...

I've set it on the ground and rolled it out into the sun for the first time EVER! :cheers:
Image
Image

I resisted doing this for a long time, trying to focus on getting done everything I could while the chassis was still up on the build table. But the time came to do the floor pan, and instead of taking the engine and everything out up on the table, I figured it would be easier to do it on a set of short stands, which I'll whip up with some 1x1 and 1x2 tubing. Keep in mind I still don't have the correct wheels/tires and in place of springs I've cut some sections of PVC tubing, so the ride height and stance are far from correct. It still rolled really well, and I had more than enough steering lock to comfortably maneuver the car in and out of the garage.

It actually looks a bit bigger than I expected sitting next to my Subaru. But it's also significantly narrower than the wide-fendered rally wannabe :-)
Image
Image
Image
Image
Image
Image
Image
Image
Image
Image
Image

I also created a heat shield/mounting tray for the fuel tank
Image

And I bent some sections of aluminum to attach the tank to the shield
Image

And here's a shot of the relief for the tank's sump from below.
Image

More updates to follow, still need to take more pictures of some of the other projects I've been busy with!

_________________
-Emile
Scratch building an IRS, RX-7 based book chassis @ myBuild Log

*Make way for the luckEseven!


Top
 Profile  
Reply with quote  
PostPosted: August 1, 2011, 12:06 pm 
Offline
Man of Constant Hazard
User avatar

Joined: February 20, 2006, 11:18 am
Posts: 3186
Location: Lexington, KY
Awesome!!!

_________________
...nowadays people are so intellectually lazy and lethargic that they can't build ANYTHING with their hands. They'll spend hours watching whiny people marooned on an island, but won't spend a second adding anything to the world. -weconway
Visit my [Locost 7 build log]


Top
 Profile  
Reply with quote  
PostPosted: August 2, 2011, 5:55 pm 
Offline
Always Moore!
User avatar

Joined: November 9, 2007, 3:40 pm
Posts: 4075
Location: Pittsburgh, PA
Looks good. Just wait until the Locost is running - you will have a difficult choice each morning.

_________________
-Andrew
Build Log
Youtube


Top
 Profile  
Reply with quote  
PostPosted: August 21, 2011, 10:14 pm 
Offline
Louisville's luckEseven Lauds Locosts
User avatar

Joined: December 21, 2006, 2:30 pm
Posts: 337
Location: Louisville, KY
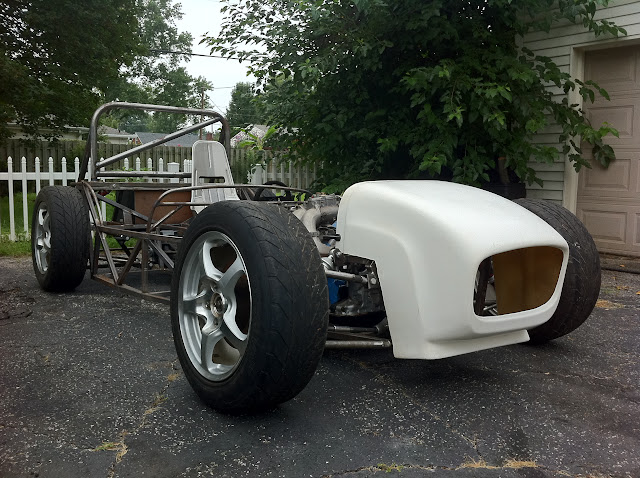
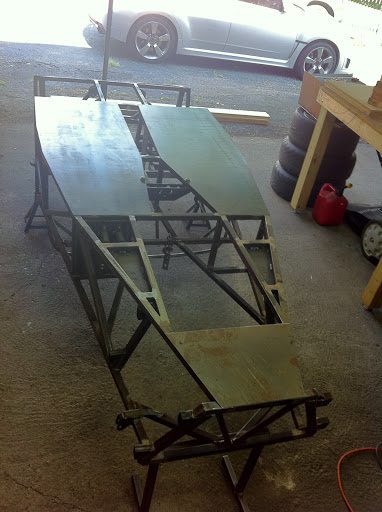
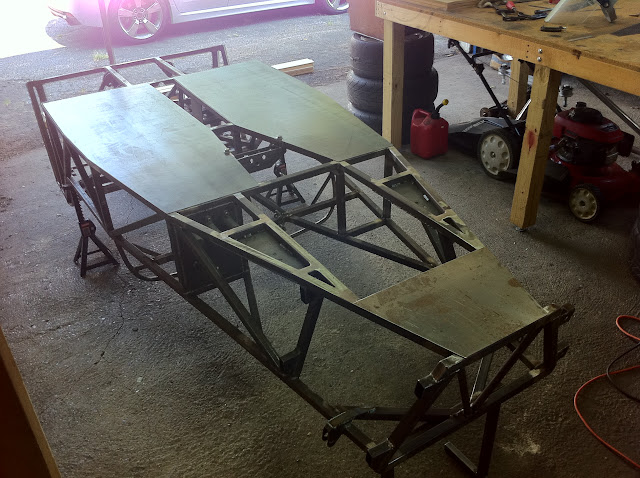
After reaching the milestone of "rolling" it around (and possibly making Vroom Vroom noises... :roll: ) I decided to carry on with getting the frame as close to done as possible. That meant taking everything back off and getting it to where I could flip it upside down or on it's side, depending on what I'm working on.

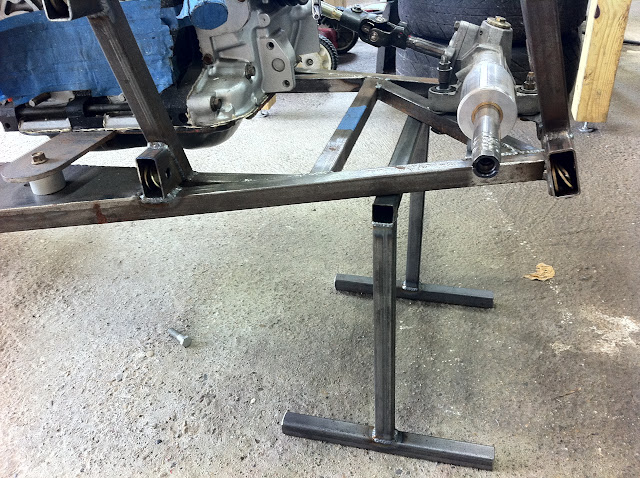
I already had a set of jack stands kicking around in the garage, so I used those for the back. I decided instead of buying another pair of jack stands, I could make something simpler and sturdier out of material I had laying around. So I used my floor jack to set the height, jacking it all the way up and making the front stand height even with the back. This way I can use just a normal floor jack to put the car up on the high stands. It's a good height for working in the engine bay comfortably standing, while using a roll-around stool for servicing brakes/suspension, plus it's high enough to be able to lay under the car to change fluids and work under the car. :cheers:

Pic of the car on my homemade high stand
Image

Simple and solid
Image

Jack stands at the back of the chassis
Image

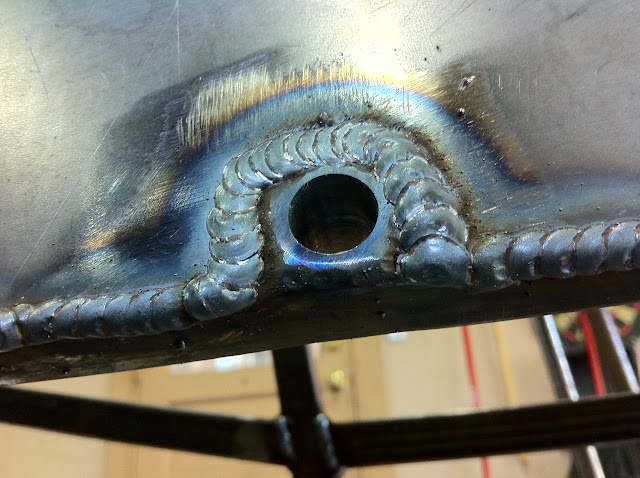
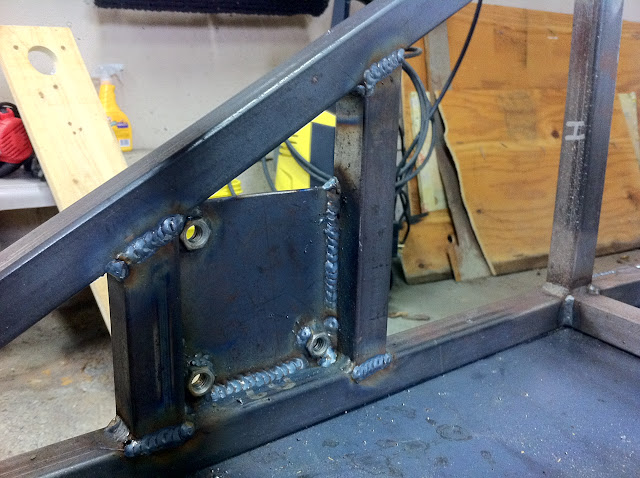
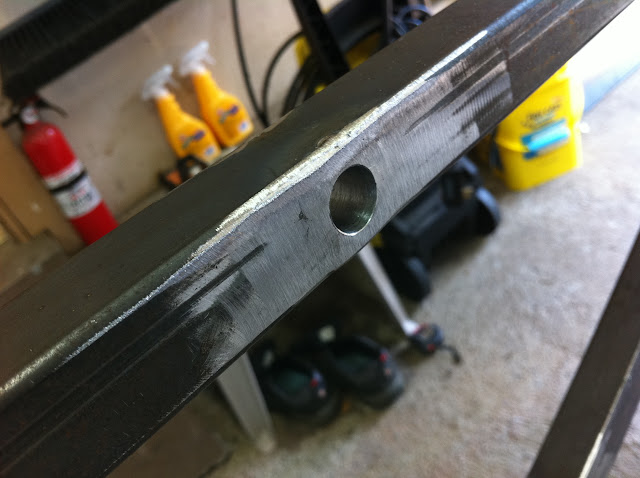
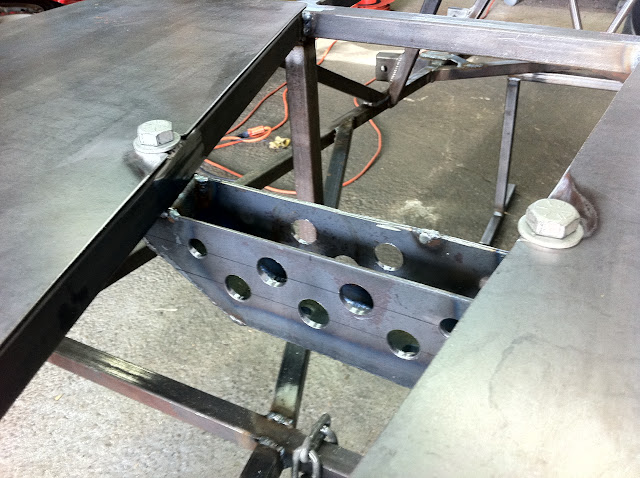
Welded an 1/8" wall section of tubing into the frame rails that the trans mount bolts go through to keep the bolts from squishing the tubes as the bolts are tightened. On the mount side the sleeve was welded flush and ground smooth, on the under side I left 1/8" sitting proud to be able to weld it a bit better. Here is the bottom side.
Image

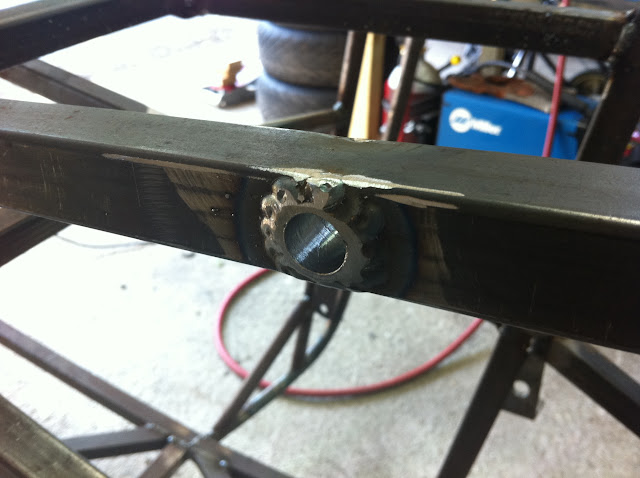
And here is the smooth mount side.
Image

And here they are with the trans mount installed
Image

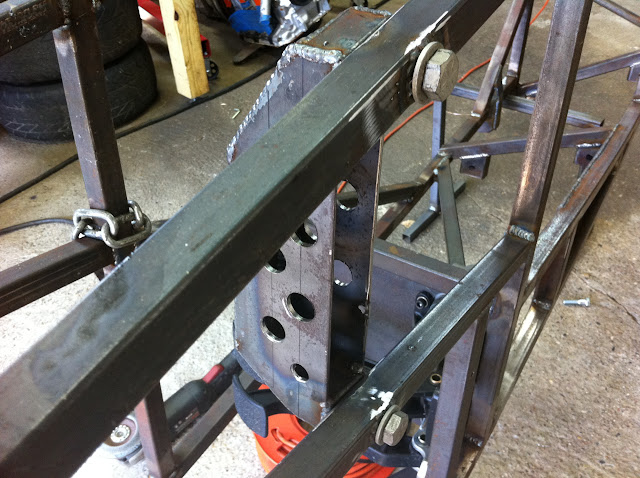
Another view of the trans mount
Image

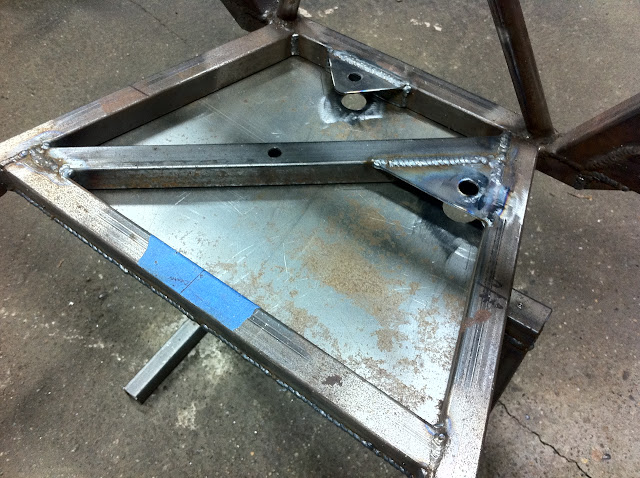
Since the frame was bare again, I did some more finish welding. Specifically the bottom rails which were then ground smooth to make room for the floor pans. More on this later. Here is the under side of the motor mount plate (the top side is fully welded too, don't know why I bothered but it didn't look right without something underneath.
Image

Welded the driver's firewall (obviously the frame is upside down in the pic)
Image

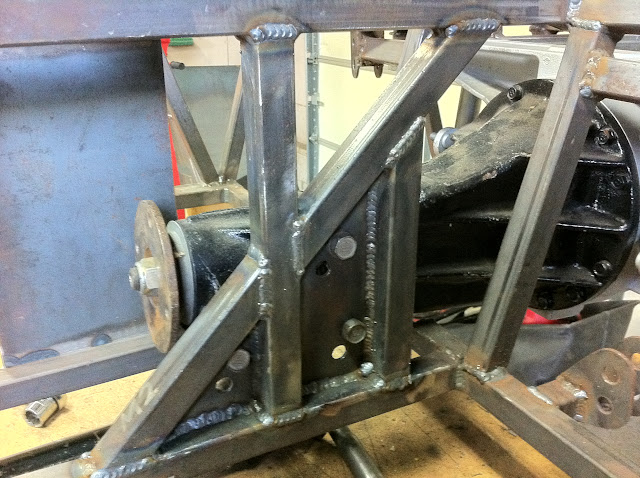
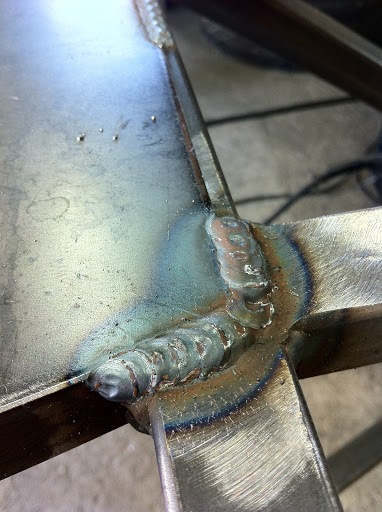
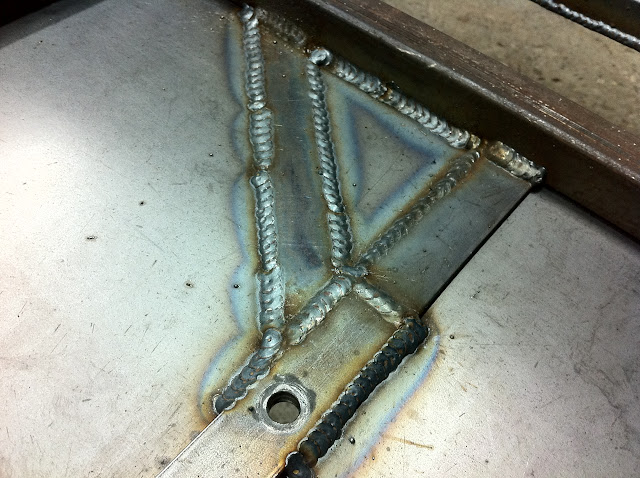
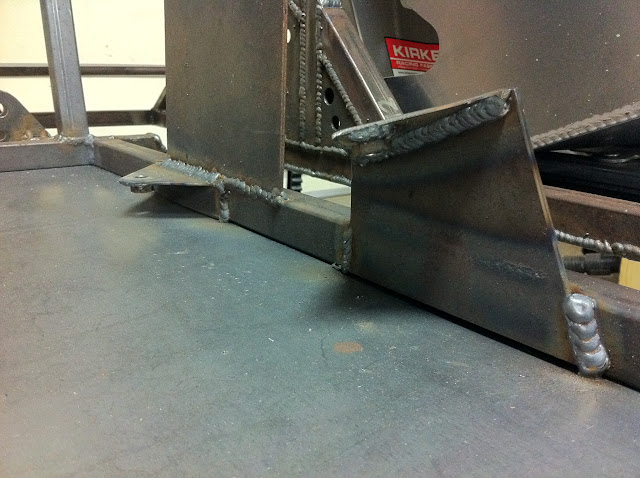
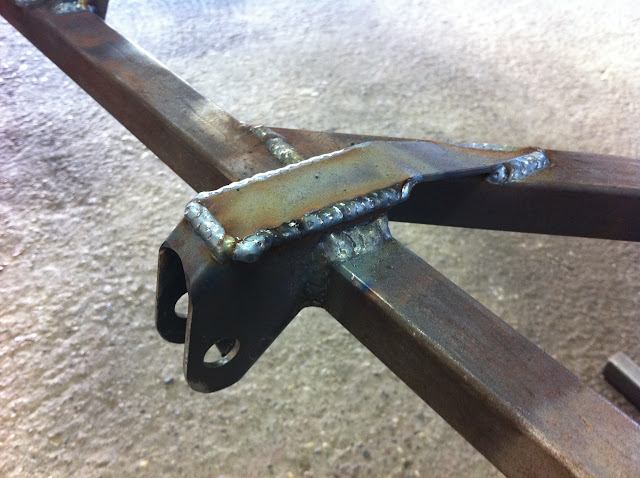
Again, here's a view from underneath. This is my front shock mount that is welded in two full planes on the outer frame rail, but thought this "tension strap" could help carry the load to another rail and further beef-up the shock mount, as a LOT of load will go through this guy.
Image

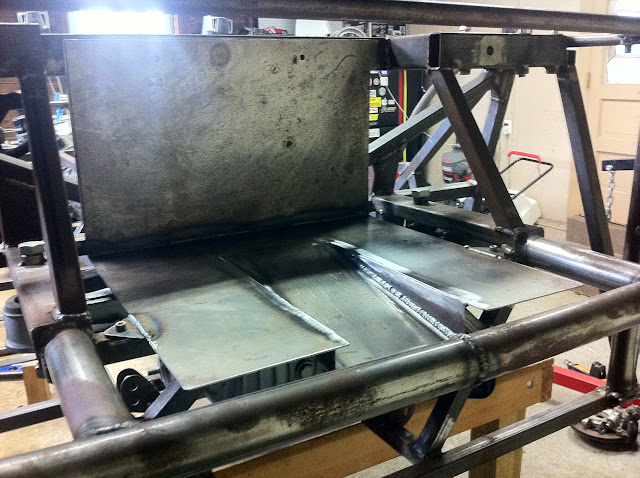
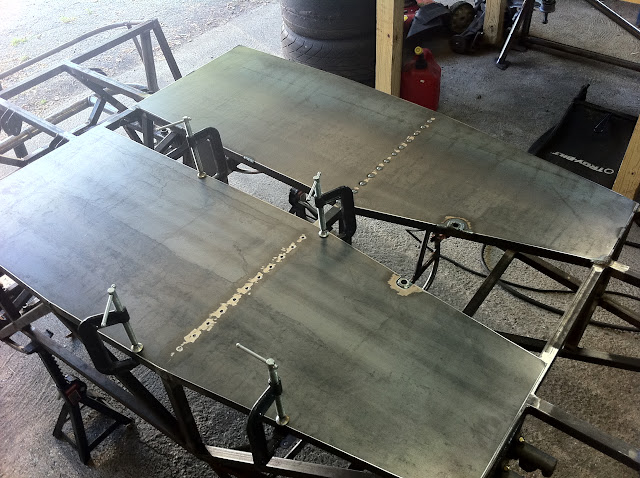
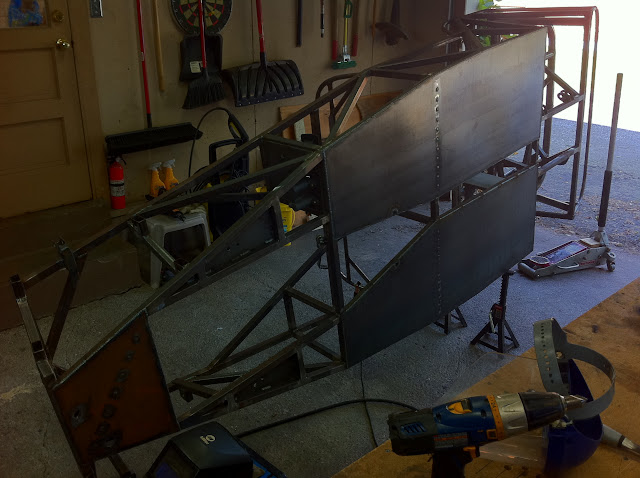
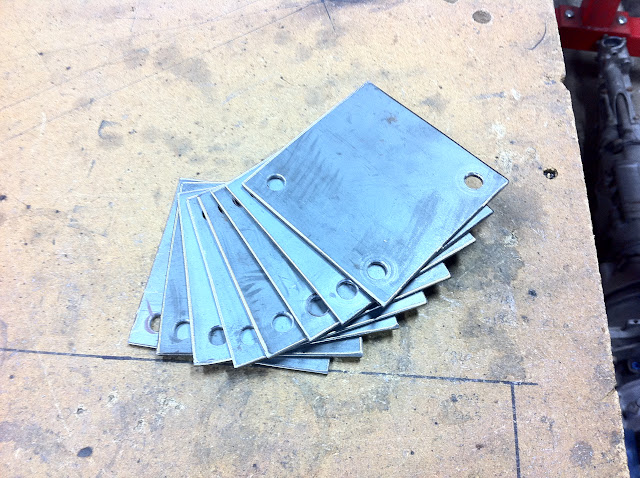
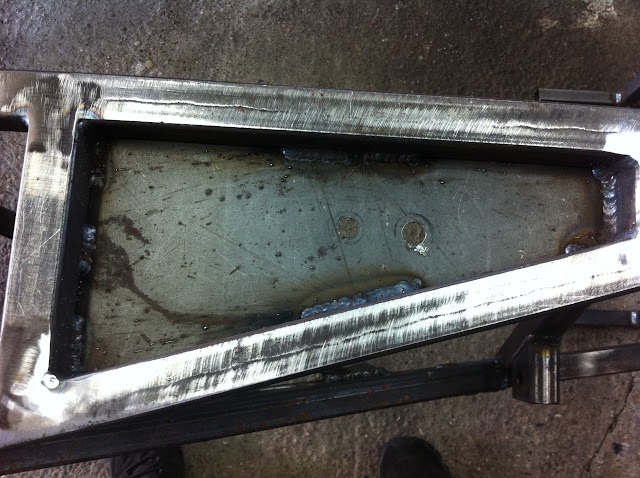
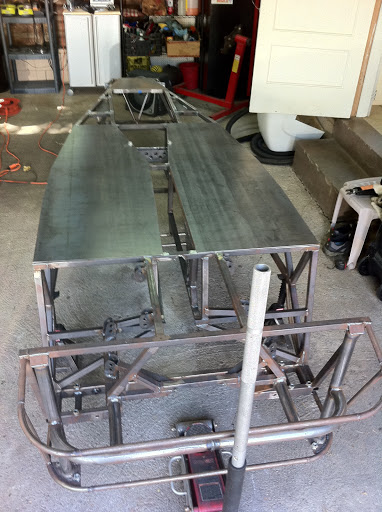
Finally got around to cutting my steel floor plates. I decided on steel mainly due to cost, but also ease of installation and potentially better structural properties with steel vs alum. I don't mind the approx 15 pound weight penalty, as long as it's very low in the chassis and helps structural rigidity (I know this is up for debate :boxing: )
Image

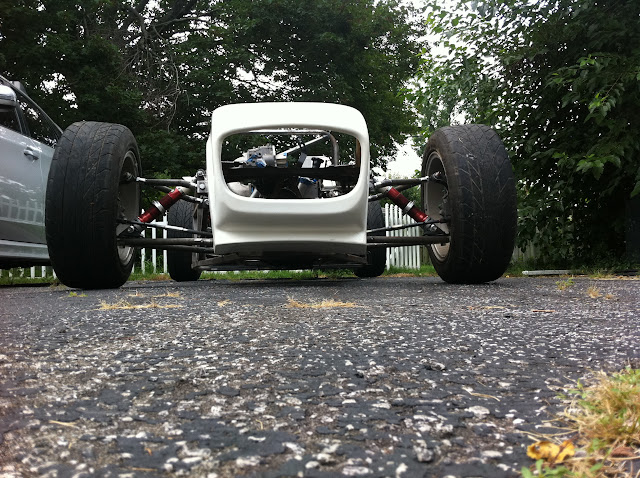
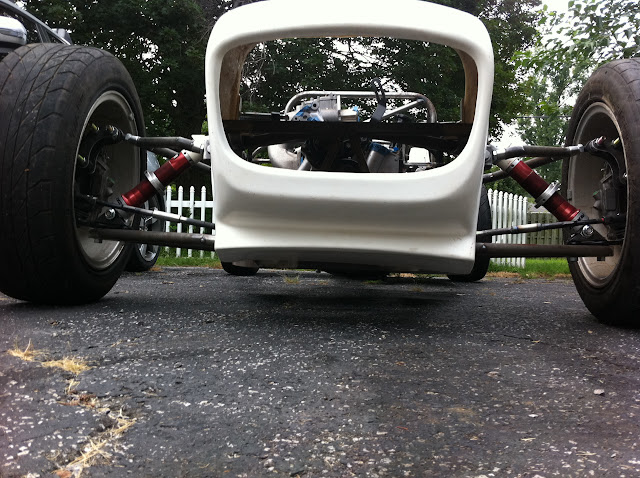
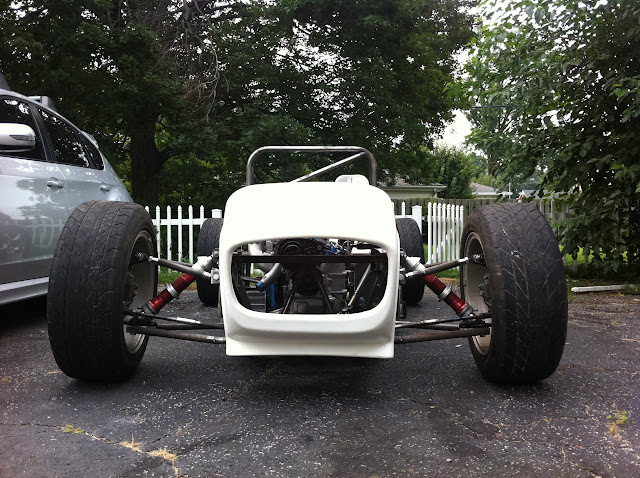
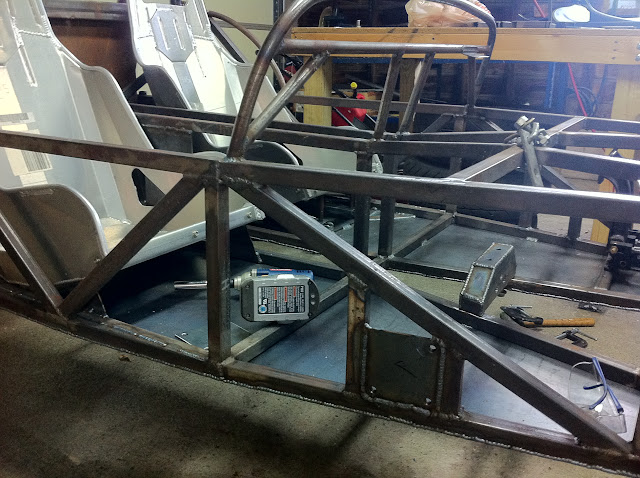
Another view of the floors with the Aussie Mod front section.
Image

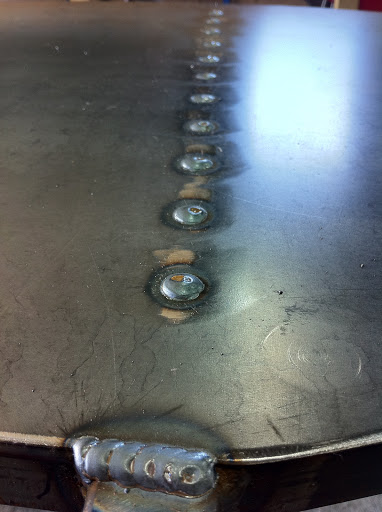
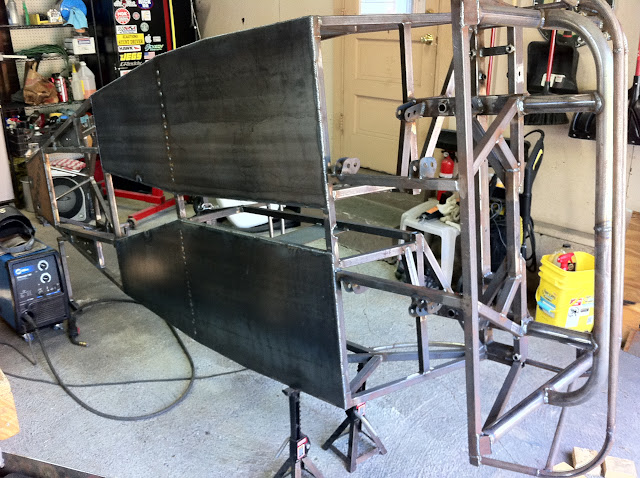
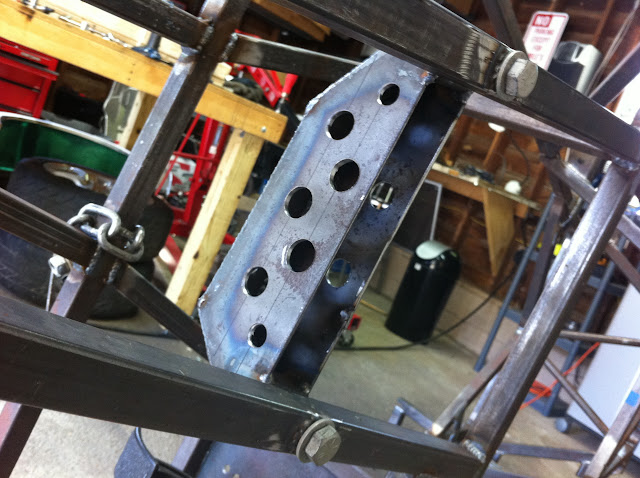
A view of the trans mount bolts and how the floor pans wrap around the protruding "sleeves"
Image

Unfortunately I ran out of gas :BH: so I couldn't weld the floor yet. But it's ready to go otherwise. Going off recommendations I read here, I decided to take the floors all the way out to the edge to make the side panel installation easier down the road.
Image

_________________
-Emile
Scratch building an IRS, RX-7 based book chassis @ myBuild Log

*Make way for the luckEseven!


Top
 Profile  
Reply with quote  
PostPosted: August 24, 2011, 9:55 pm 
Offline
User avatar

Joined: September 17, 2007, 10:36 pm
Posts: 209
Location: Montreal, Canada
Great work, as always. Still jealous about the shocks. :wink:

On a side note, what is it with 7s and Subaru daily drivers... there's at least 3 of us. 8)

_________________
Concordia University FSAE - Chassis
00 Impreza OBS - RIP
81 Rabbit 1.6D
95 525i


Top
 Profile  
Reply with quote  
PostPosted: August 25, 2011, 11:36 am 
Offline
Louisville's luckEseven Lauds Locosts
User avatar

Joined: December 21, 2006, 2:30 pm
Posts: 337
Location: Louisville, KY
AK Seven wrote:
Great work, as always. Still jealous about the shocks. :wink:

On a side note, what is it with 7s and Subaru daily drivers... there's at least 3 of us. 8)


Thanks, AK Seven.

Yeah, I dunno what it is with Suby drivers and Locosts. Though I'm willing to bet there are far more Locost builders who've owned Miatas, myself included (I've owned two, actually).

_________________
-Emile
Scratch building an IRS, RX-7 based book chassis @ myBuild Log

*Make way for the luckEseven!


Top
 Profile  
Reply with quote  
PostPosted: August 25, 2011, 11:42 am 
Offline
Mid-Engined Maniac

Joined: April 23, 2006, 8:26 pm
Posts: 6417
Location: SoCal
It would be a VERY good idea to put a diagonal on that stand. It's very dicey as-is.

_________________
Midlana book: Build this mid-engine Locost!, http://midlana.com/stuff/book/
Kimini book: Designing mid-engine cars using FWD drivetrains
Both available from https://www.lulu.com/


Top
 Profile  
Reply with quote  
PostPosted: August 25, 2011, 11:57 am 
Offline
Louisville's luckEseven Lauds Locosts
User avatar

Joined: December 21, 2006, 2:30 pm
Posts: 337
Location: Louisville, KY
KB58 wrote:
It would be a VERY good idea to put a diagonal on that stand. It's very dicey as-is.


I agree, Kurt. As solid as it is currently, it can't hurt to err on the safe side.

_________________
-Emile
Scratch building an IRS, RX-7 based book chassis @ myBuild Log

*Make way for the luckEseven!


Top
 Profile  
Reply with quote  
PostPosted: August 25, 2011, 3:47 pm 
Offline
Man of Constant Hazard
User avatar

Joined: February 20, 2006, 11:18 am
Posts: 3186
Location: Lexington, KY
KB58 wrote:
It would be a VERY good idea to put a diagonal on that stand. It's very dicey as-is.


+1

I'd put them in both directions...but I tend to overthink things a bit.

_________________
...nowadays people are so intellectually lazy and lethargic that they can't build ANYTHING with their hands. They'll spend hours watching whiny people marooned on an island, but won't spend a second adding anything to the world. -weconway
Visit my [Locost 7 build log]


Top
 Profile  
Reply with quote  
PostPosted: September 18, 2011, 9:01 pm 
Offline
Louisville's luckEseven Lauds Locosts
User avatar

Joined: December 21, 2006, 2:30 pm
Posts: 337
Location: Louisville, KY
Floors fully welded around the perimeter, with a row of plug welds in 1/4" holes across the main lateral tube.
Image

Close-up of plug welds
Image

Corner weld
Image

Floors and "aussie mod" panel up front
Image

If you're wondering, the steel floor (.065" thick) weighed 32 lbs all together.
Image

Seam welding
Image

Welding around transmission mounting boss
Image

Also worked on the driver's seat mount. It was a bit of a struggle trying to come up with the best solution for mounting the seat with the sliding seat rails I had, since there was no feasible way to mount it to the frame rails, and I wanted the seat absolutely as low as possible, I came up with this solution which is quite sturdy. I'm sure I'll get flamed for it :BH:
Image

Floor reinforcement welds
Image

Here's a close-up of the "aussie mod" panel, with cutouts big enough for a bolt/washer and the appropriate socket to turn said bolt from below to mount the steering rack.
Image

Also cut-out 8 identical pads to copy Jeff's R1-powered bolt-on cage for the two door bar mounts on each side. These turned out well, it's harder than you'd think to make 8 of these as uniform as possible
Image

Then welded nuts to the back side of half of them to be welded in the chassis
Image

Then welded some vertical braces to the frame and welded the pads in place. This should give a bit more surface area in case these guys ever see any action :shock:
Image

Ugly welding, but it'll be ground down flush and covered with an ally panel, they're also welded on the inside.
Image

Inner welding, a bit better looking
Image

Also finally got around to mounting the passenger side seat. It looks crooked because the passenger side trans tunnel tube is angled to make room for the RX7 offset diff, but the seat is actually straight.
Image

Seat mounts welded to the frame rail sides.
Image

These guys are pretty beefy. Will be welded below to the floor as well.
Image

Other side seat mounts.
Image

_________________
-Emile
Scratch building an IRS, RX-7 based book chassis @ myBuild Log

*Make way for the luckEseven!


Top
 Profile  
Reply with quote  
PostPosted: March 3, 2012, 2:17 pm 
Offline

Joined: January 26, 2012, 12:13 am
Posts: 9
Hey hows it goin. Just finished reading through your build, its awsome. Im starting the chassis now, do you have any advise?

Matt.


Top
 Profile  
Reply with quote  
PostPosted: October 28, 2012, 7:13 pm 
Offline
User avatar

Joined: October 26, 2012, 3:05 am
Posts: 92
Nice build here i love it,

Question, i see you got the car in the floor on its 4 tires, but it is me or the ride height is where it supposed to be, even without the springs installed on the shocks, or it will sit higher than that?


Top
 Profile  
Reply with quote  
Display posts from previous:  Sort by  
Post new topic Reply to topic  [ 111 posts ]  Go to page Previous  1 ... 3, 4, 5, 6, 7, 8  Next

All times are UTC - 5 hours [ DST ]


Who is online

Users browsing this forum: No registered users and 13 guests


You cannot post new topics in this forum
You cannot reply to topics in this forum
You cannot edit your posts in this forum
You cannot delete your posts in this forum
You cannot post attachments in this forum

Jump to:  
POWERED_BY