LocostUSA.com

Learning how to build Lotus Seven replicas...together!
It is currently April 16, 2024, 12:48 am

All times are UTC - 5 hours [ DST ]


Post new topic Reply to topic  [ 2903 posts ]  Go to page Previous  1 ... 126, 127, 128, 129, 130, 131, 132 ... 194  Next
Author Message
PostPosted: November 5, 2018, 7:37 pm 
Offline
Automotive Encyclopedia
User avatar

Joined: December 22, 2006, 2:05 pm
Posts: 8041
Ok. I'm going to look at a 2002 mustang for the aluminum calipers tomorrow, which I think are what you are using. :)

_________________
Miata UBJ: ES-2074R('70s maz pickup)
Ford IFS viewtopic.php?f=5&t=13225&p=134742
Simple Spring select viewtopic.php?f=5&t=11815
LxWxHt
360LA 442E: 134.5x46x15
Lotus7:115x39x7.25
Tiger Avon:114x40x13.3-12.6
Champion/Book:114x42x11
Gibbs/Haynes:122x42x14
VoDou:113x44x14
McSorley 442:122x46x14
Collins 241:127x46x12


Top
 Profile  
Reply with quote  
PostPosted: November 6, 2018, 12:48 pm 
Offline
User avatar

Joined: October 24, 2008, 2:13 pm
Posts: 5326
Location: Carlsbad, California, USA
@MV8

Oh, how I wish it were so. However, I'm using the stock '94 SN95 brakes off the V6 version. Everything is just iron/steel. The disc brakes are 10.9" up front and 10.5" at back with single piston calipers.

With a little clearance grinding on the front spindles, and new flanges on the live rear axle, the brakes can be upgraded to the SVT Cobra version, but I'm not sure that will be necessary. It would probably cost multiples of what I spent on my donor Mustang anyway. :roll:

Cheers,

_________________
Damn! That front slip angle is way too large and the Ackerman is just a muddle.

Build Log: viewtopic.php?f=35&t=5886


Top
 Profile  
Reply with quote  
PostPosted: November 9, 2018, 8:48 pm 
Offline
User avatar

Joined: October 24, 2008, 2:13 pm
Posts: 5326
Location: Carlsbad, California, USA
Today was the day I almost quit my build project. I ran into a very nasty little problem of my own making, and I almost, honest to God, quit the whole damn thing. I really thought, "Screw it! I'm taking money out of my retirement funds and buying a Caterham." :twisted: Fortunately, some quick addition and subtractions with respect to the purchase price of a Caterham brought me back to reality very quickly. :roll:

The objective today was to get the rear axle into the chassis that I just returned to the build table. It never was easy to place it properly, but it would go. However, that was before I welded on all the brackets, and critically, the emergency brake system.

To go in, the axle must be turned onto the rear cover, slid in place on a section of plywood sheet, the plywood removed, and then rotated forward (towards the seatback) 90°, then slid forward to it's final position. It's tricky, but if you watch your fingers, it's do-able. The problem is that I took up my small amount of slack space with the emergency brake bracket and also prevented full rotation on the build table with the trailing arm brackets. It was really my own fault. I just didn't leave enough clearance to do the job easily.

To do the placement now, it has to come in from the bottom and the pinion rotated upwards to get enough clearance. That's much easier to do from jack stands rather than the height of the build table. :BH: Also, fortunately for me, I had cut away part of the build table, so the Panhard rod system could be fabricated in place, which provided an entry hole from underneath. That was just dumb luck on my part, but it's the way things will be on the completed build.

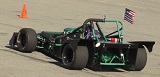
I won't go into all the struggles necessary to get it in, but suffice it to say, it was a long, long day. I also got stubborn and prideful, and just wouldn't take a break, rethink things, and get myself some help. My wife had the good sense to call a neighbor, who really was super and stuck with us until the job got done, for which I'm truly grateful. So, here it is in proper orientation and up on blocks. The correct height will be set when the tires and wheels are on, and some "shelves" have been added to the build table hold them (and the live axle) independently.
Attachment:
DSC04633.JPG

Here's the little booger bracket end that served as my tormentor today. You can see the scuff marks left my the pinion shaft flange visible below it.
Attachment:
DSC04635.JPG

Here's the abuse the diff cover suffered trying to rotate the axle.
Attachment:
DSC04637.JPG

It required some real serious fiddling and several hoists with the shop crane plus the help of my wife and a neighbor.
Attachment:
DSC04630.JPG


They say, "All's well that ends well", and I'll just leave it at that for today.

Cheers,


You do not have the required permissions to view the files attached to this post.

_________________
Damn! That front slip angle is way too large and the Ackerman is just a muddle.

Build Log: viewtopic.php?f=35&t=5886


Top
 Profile  
Reply with quote  
PostPosted: November 10, 2018, 12:12 am 
Offline

Joined: March 15, 2018, 6:03 am
Posts: 160
Great perseverance... and you would never have ben as proud of a Caterham as you will with this...


Top
 Profile  
Reply with quote  
PostPosted: November 10, 2018, 10:24 am 
Offline
User avatar

Joined: October 24, 2008, 2:13 pm
Posts: 5326
Location: Carlsbad, California, USA
@MangPong
Thank you. Today's a new day. So, I'll get back at it. Upward and onward!

Cheers,

_________________
Damn! That front slip angle is way too large and the Ackerman is just a muddle.

Build Log: viewtopic.php?f=35&t=5886


Top
 Profile  
Reply with quote  
PostPosted: November 10, 2018, 11:15 am 
Offline
Automotive Encyclopedia
User avatar

Joined: December 22, 2006, 2:05 pm
Posts: 8041
That would be hard work to get that in and out. If it comes out again, consider a removeable rail on one side.

Pilot drill where there is at least an inch of space on the tight side of the rail for the nut and washer.
Open up with a unibit to accept a piece of pipe or dom with a 3/8-1/2 id that is 1/2 inch longer than the tube is wide and weld in place.
Cut the rails on the side of the sleeves toward the removeable section. Cap the cut ends on the frame if you want.
Bend a C bracket to wrap the sleeve and drill then bolt them in place.
Trim the removable section to fit between the U brackets and weld.
Paint and your done. :cheers:


You do not have the required permissions to view the files attached to this post.

_________________
Miata UBJ: ES-2074R('70s maz pickup)
Ford IFS viewtopic.php?f=5&t=13225&p=134742
Simple Spring select viewtopic.php?f=5&t=11815
LxWxHt
360LA 442E: 134.5x46x15
Lotus7:115x39x7.25
Tiger Avon:114x40x13.3-12.6
Champion/Book:114x42x11
Gibbs/Haynes:122x42x14
VoDou:113x44x14
McSorley 442:122x46x14
Collins 241:127x46x12


Last edited by Miatav8,MstrASE,A&P,F on November 11, 2018, 8:03 am, edited 1 time in total.

Top
 Profile  
Reply with quote  
PostPosted: November 10, 2018, 11:18 am 
Offline
User avatar

Joined: March 19, 2011, 10:22 am
Posts: 2390
Location: Holden, Alberta, Canada
You now know it fits, you can relax.
I too have learnt that sometimes 2 solid pieces of steel can't occupy the same space at the same time. Has caused me to rethink and then rework the issue - all part of the hobby.
Good job Lonnie, keep at it :cheers:

_________________
Perry

'If man built it, man can fix it'
"No one ever told me I couldn't do it."
"If you can't build it safe, don't build it."

Perry's Locost Super Che7enette Build
Perry's TBird Based 5.0L Super 7 L.S.O
Perry's S10 Super 7 The 3rd
Perry's 4th Build The Topolino 500 (Little Mouse) Altered
Perry's 5th Build the Super Slant 6 Super 7
Perry's Final Build the 1929 Mercedes Gazelle


Top
 Profile  
Reply with quote  
PostPosted: November 10, 2018, 11:27 am 
Offline
User avatar

Joined: March 19, 2011, 10:22 am
Posts: 2390
Location: Holden, Alberta, Canada
Miatav8,MstrASE,A&P,F wrote:
If it comes out again, consider a removeable rail on one side.


http://www.locostusa.com/forums/viewtopic.php?f=35&t=12234&start=30

That's what I had to do one build #1, scroll 1/2 way down the page to see the frame br@cket fabrication that happened on both sides.

_________________
Perry

'If man built it, man can fix it'
"No one ever told me I couldn't do it."
"If you can't build it safe, don't build it."

Perry's Locost Super Che7enette Build
Perry's TBird Based 5.0L Super 7 L.S.O
Perry's S10 Super 7 The 3rd
Perry's 4th Build The Topolino 500 (Little Mouse) Altered
Perry's 5th Build the Super Slant 6 Super 7
Perry's Final Build the 1929 Mercedes Gazelle


Top
 Profile  
Reply with quote  
PostPosted: November 11, 2018, 11:58 am 
Offline
User avatar

Joined: October 24, 2008, 2:13 pm
Posts: 5326
Location: Carlsbad, California, USA
@MV8
@horchoha

Thanks gents for taking the time to think about this and suggest solutions. I'll keep both of them in mind as I go forward.

As things are now, getting the rear axle in and out is going to be a challenge, but now that I know it can be done, I'm going to see how much easier I can make the process once the car is on it wheels and/or jack stands. Part of the difficulty was the height of the chassis off the ground sitting on the build table. It was difficult to get the shop crane in position and getting (human) leverage to lift it was even more difficult than that. I have the cuts bruises to prove it [LOL].

I'm going to take the chassis off the build table with the rear axle in place. Perhaps with the resulting the change in altitude and leverage, the task will get easier? We'll see.

Cheers,

_________________
Damn! That front slip angle is way too large and the Ackerman is just a muddle.

Build Log: viewtopic.php?f=35&t=5886


Top
 Profile  
Reply with quote  
PostPosted: November 11, 2018, 12:43 pm 
Offline
User avatar

Joined: March 30, 2011, 7:18 am
Posts: 1615
Location: central Arkansas
Y'know, MiataV8 has a point. But I'd consider cutting the whole rear of the car off at the seat bulkhead and putting the splices there.

Then you could install and adjust the rear end out in the open and slide the tail section over it when you were done. And it'd simplify crash repair, or damage from one of those idiots who parks by bashing bumpers.

Your main suspension loads are your 4-link, and none of that would pass through the splices.


Top
 Profile  
Reply with quote  
PostPosted: November 12, 2018, 7:36 am 
Offline
We are Slotus!
User avatar

Joined: October 6, 2009, 9:29 am
Posts: 7651
Location: Tallahassee, FL (The Center of the Known Universe)
MV8's skill with "MS Paint" is pretty much the equivalent to an engineering degree, doncha think?

:cheers:
JD "Can't Draw a Straight Line" Kemp


Top
 Profile  
Reply with quote  
PostPosted: November 12, 2018, 8:35 am 
Offline
Automotive Encyclopedia
User avatar

Joined: December 22, 2006, 2:05 pm
Posts: 8041
horchoha wrote:
Miatav8,MstrASE,A&P,F wrote:
If it comes out again, consider a removeable rail on one side.


http://www.locostusa.com/forums/viewtopic.php?f=35&t=12234&start=30

That's what I had to do one build #1, scroll 1/2 way down the page to see the frame br@cket fabrication that happened on both sides.


I remember seeing that; nicely done imho. I intend to do something similar the spitfire irs below the cv.

_________________
Miata UBJ: ES-2074R('70s maz pickup)
Ford IFS viewtopic.php?f=5&t=13225&p=134742
Simple Spring select viewtopic.php?f=5&t=11815
LxWxHt
360LA 442E: 134.5x46x15
Lotus7:115x39x7.25
Tiger Avon:114x40x13.3-12.6
Champion/Book:114x42x11
Gibbs/Haynes:122x42x14
VoDou:113x44x14
McSorley 442:122x46x14
Collins 241:127x46x12


Top
 Profile  
Reply with quote  
PostPosted: November 12, 2018, 8:40 am 
Offline
Automotive Encyclopedia
User avatar

Joined: December 22, 2006, 2:05 pm
Posts: 8041
GonzoRacer wrote:
MV8's skill with "MS Paint" is pretty much the equivalent to an engineering degree, doncha think?

:cheers:
JD "Can't Draw a Straight Line" Kemp


A single hand rises slowly from the back of the room... There is a delicious, crispy smell.... It's mv8! :shock: That just happened! Shake&Bake!

Maybe I can get one of those "honorary degrees" (should be renamed) they hand out to celebs who kiss the right Azz. Nah!

_________________
Miata UBJ: ES-2074R('70s maz pickup)
Ford IFS viewtopic.php?f=5&t=13225&p=134742
Simple Spring select viewtopic.php?f=5&t=11815
LxWxHt
360LA 442E: 134.5x46x15
Lotus7:115x39x7.25
Tiger Avon:114x40x13.3-12.6
Champion/Book:114x42x11
Gibbs/Haynes:122x42x14
VoDou:113x44x14
McSorley 442:122x46x14
Collins 241:127x46x12


Top
 Profile  
Reply with quote  
PostPosted: November 16, 2018, 8:05 pm 
Offline
User avatar

Joined: October 24, 2008, 2:13 pm
Posts: 5326
Location: Carlsbad, California, USA
I spent some time reviewing my 2-year old rear suspension notes, measuring on my 3D model and pulling some old jigs out of storage. My objective was to verify that I would be setting the rear axle in the correct place before I started to make the trailing arm mounts.

To hold the a rear axle and wheels/tires in the correct location, but allow me to adjust the whole assembly, I made some "shelves" for both sides of the build table and clamped them at the correct height and attitude to give me my 6" ride height. Using some scrap wood, I constructed a simple piece to let me see at a glance if the relationship to the top of the build table (bottom of the undertray) was right and the shelves were flat and square.
Attachment:
DSC04638.JPG


The Clamps would not reliably hold the weight of the rear axle, wheels and tires by themselves. So, I added a simple leg with an adjuster bold to take the weight. The clamps just preserve the attitude of the shelves.
Attachment:
DSC04641.JPG


Some simple jigs to hold the axle at the correct fore and aft location were brought out of storage and attached.
Attachment:
DSC04645.JPG


The rear axle and wheels are now fully established in their correct location and height.
Attachment:
DSC04642.JPG


The pinion angle is correct for making the trailing arm mounts. However, I need to make something adjustable so I can hold it at a 2 degree up angle later.
Attachment:
DSC04643.JPG


Cheers,


You do not have the required permissions to view the files attached to this post.

_________________
Damn! That front slip angle is way too large and the Ackerman is just a muddle.

Build Log: viewtopic.php?f=35&t=5886


Top
 Profile  
Reply with quote  
PostPosted: November 28, 2018, 9:51 pm 
Offline
User avatar

Joined: October 24, 2008, 2:13 pm
Posts: 5326
Location: Carlsbad, California, USA
Today's project was working on the axle-side Panhard rod mount. I had a design pretty much competed, and some parts made in the past. A huge part of my motivation for building a Locost was to create a performance car much more capable than anything I could afford to buy. My "mental" performance model is the Caterham 620R. I'm not saying I'll get there, but I'm going to attempt to provide a flexible platform that I can develop over time, and perhaps approach that level of performance.

Accordingly, I'm creating the most flexible, tune-able platform I can given my donor parts. For the 4-link/Panhard rod architecture (using a live axle), the Panhard rod is a major feature and can be used to control several aspects of the rear suspension behavior. I've used a lot of ideas from American circle track racing. Those guys have this architecture down pat, and I've chosen to adapt a number of their ideas to my road car. Here's one example:
Attachment:
KMJ-KPP-3001-Adj-Panhard-Mount.jpg

This axle-side mount goes on the live axle and mounts one end of the Panhard rod. You can loosen the clamps and rotate the mount about the axle tube, effectively raising or lowering the roll center at the rear up or down. When combined with an adjustable, chassis-side mount you can configure the characteristics of the rear suspension significantly, including counteracting roll steer and torque steer.

I had developed a design of my own primarily because no one builds a commercial unit for the Ford 7.5" rear axle I have, only the 8.8" and 9" axles. The axle clamps are the hardest part as there's no way I can roll 1/8" plate, the typical clamp material. I've had to do some creative scrounging at my metal supplier and Home Depot, but I think I'm there.

I found a piece of 3" O.D., 120 wall tube. I cut out a piece, the split it on the band saw. I didn't take a good picture of the split pieces on the axle tube, but it is an excellent fit with about 3/16" gap on either side - just about perfect.
Attachment:
DSC04647.JPG

Attachment:
DSC04648.JPG


It's just abount impossible to work on the part using the axle in the chassis due to cramped spaces, but I found some cheap plumbing parts I could glue together and use as a form.
Attachment:
DSC04649.JPG

Attachment:
DSC04650.JPG

By playing with the parts on the axle tube, I found a gap just about equal to 14 gauge plate provided a good gap, and would allow me to align the clamp tubes nicely.
Attachment:
DSC04652.JPG

I cut some 1/2" x 16 gauge tubing for the clamp bolts, and jig'ed up the spaced pieces. The 1/2" tube fits a 3/8" bolt if you use a chainsaw file to reduce the weld filler height inside the tube, which I did.
Attachment:
DSC04654.JPG

It turned out pretty well. Here is the semi-finished clamp (it needs to be finish welded then cut through at the spacer slot. I had other pieces done already. There are still some to make, but here's what I have today:
Attachment:
DSC04656.JPG

Here's the general configuration based on my previous design. I may change it some in the final part. There will be 16- or 14-gauge plate used as a brace and likely a second clamp which will carry a tube meant to further triangulate the design.
Attachment:
DSC04661.JPG


I figure I'm about half way in the design/fab cycle for this part.

Cheers,


You do not have the required permissions to view the files attached to this post.

_________________
Damn! That front slip angle is way too large and the Ackerman is just a muddle.

Build Log: viewtopic.php?f=35&t=5886


Top
 Profile  
Reply with quote  
Display posts from previous:  Sort by  
Post new topic Reply to topic  [ 2903 posts ]  Go to page Previous  1 ... 126, 127, 128, 129, 130, 131, 132 ... 194  Next

All times are UTC - 5 hours [ DST ]


Who is online

Users browsing this forum: Kinetic Research and 27 guests


You cannot post new topics in this forum
You cannot reply to topics in this forum
You cannot edit your posts in this forum
You cannot delete your posts in this forum
You cannot post attachments in this forum

Jump to:  
POWERED_BY