LocostUSA.com

Learning how to build Lotus Seven replicas...together!
It is currently May 14, 2024, 11:46 pm

All times are UTC - 5 hours [ DST ]


Post new topic Reply to topic  [ 21 posts ]  Go to page 1, 2  Next
Author Message
PostPosted: April 18, 2020, 9:31 pm 
Offline
User avatar

Joined: January 11, 2017, 11:06 pm
Posts: 188
Location: Alberta
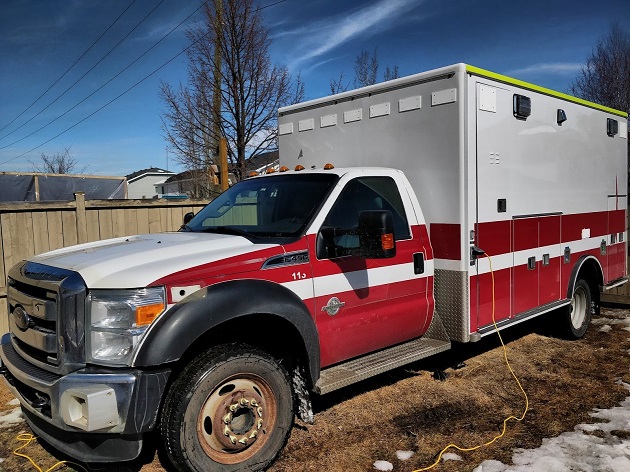
Well I got laid off last week due to COVID and the collateral damage it's caused in my sector, so I have decided to busy myself with this build. I bought this ambulance from a firehall just before COVID happened, with plans to gut it and use it to transport the Locost. I had several reasons for this, but the main ones were that I did not want to own a truck to tow a trailer, and you might be amazed how cheap an ambulance can be.

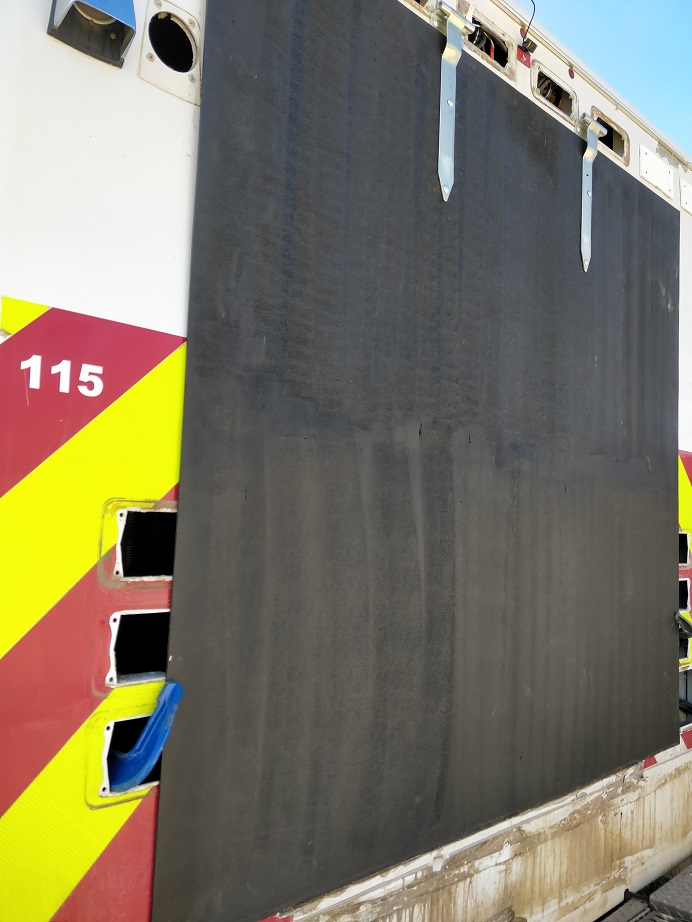
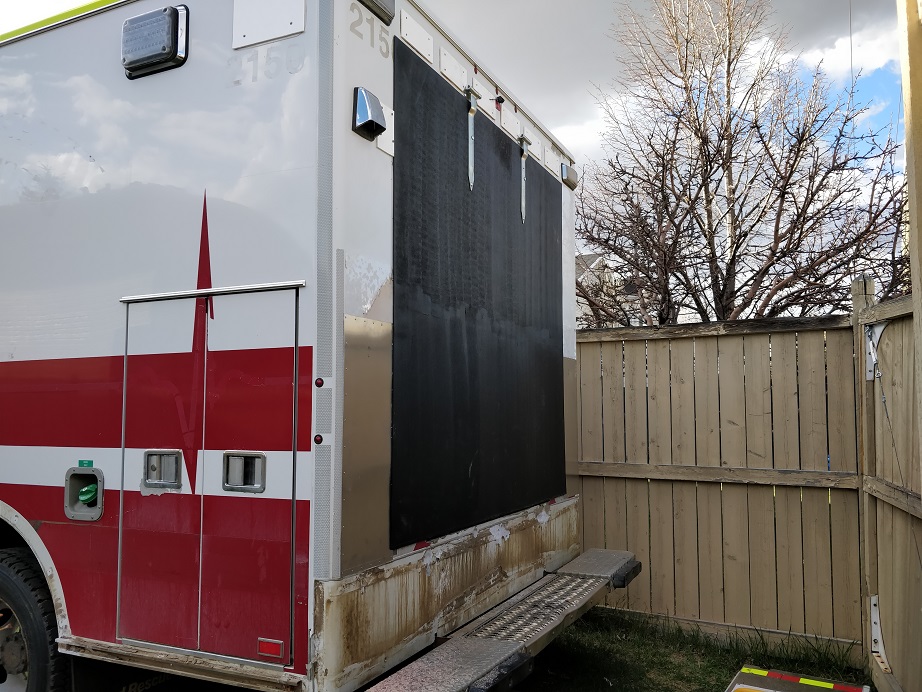
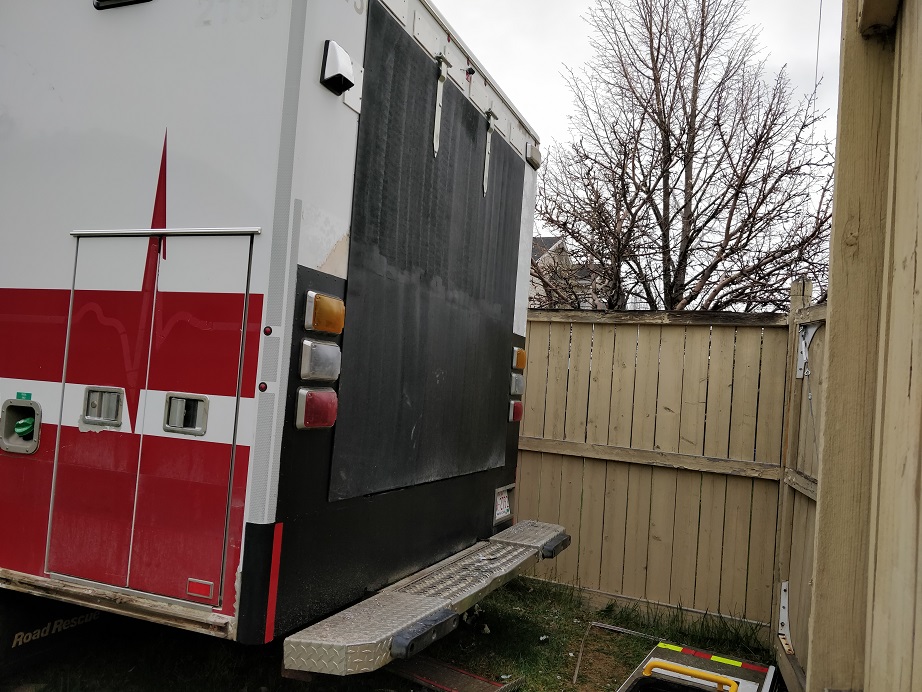
A little about the ambulance, it's a Ford F450 with the Powerstroke 6.7l engine. The mileage and idle hours are high as one might expect, but being an emergency vehicle it's very well maintained. It has a Kelderman 4-link rear suspension with airbags that has a self-leveling feature, and if I can ever figure out how, it's supposed to be able to squat the rear down several inches for loading and unloading. Surprisingly, the lights and siren were still functional, so the first thing I had to do was replace the emergency lights with blanking panels. I will try to sell those off later to offset some of the cost.

Here it is mostly as it sits right now. I left the side and rear flood lights, but removed the nifty remote-controlled spotlight it had on the roof of the cab. It's a little bigger than I wanted (a van-based Type III ambulance would have been more compact) but for the price I just couldn't say no.
Image

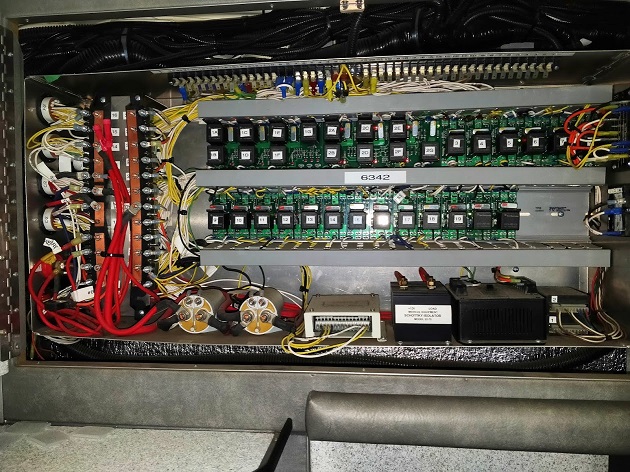
One of the great things about an ambulance is all the electrical is done VERY well. Everything is nicely loomed and labelled so you can trace anything very easily. The thing also came with a binder with complete electrical diagrams!
Image

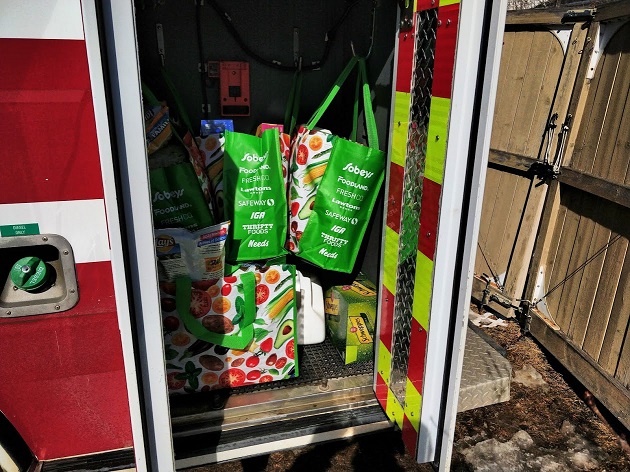
I couldn't resist using it as a grocery getter just once. I definitely got some strange looks, but it was so easy!
Image

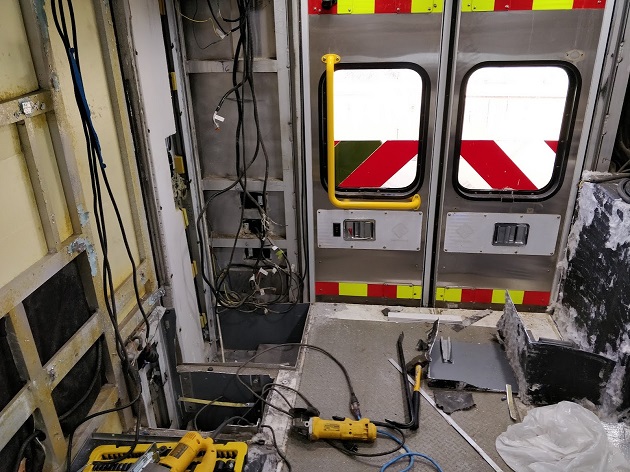
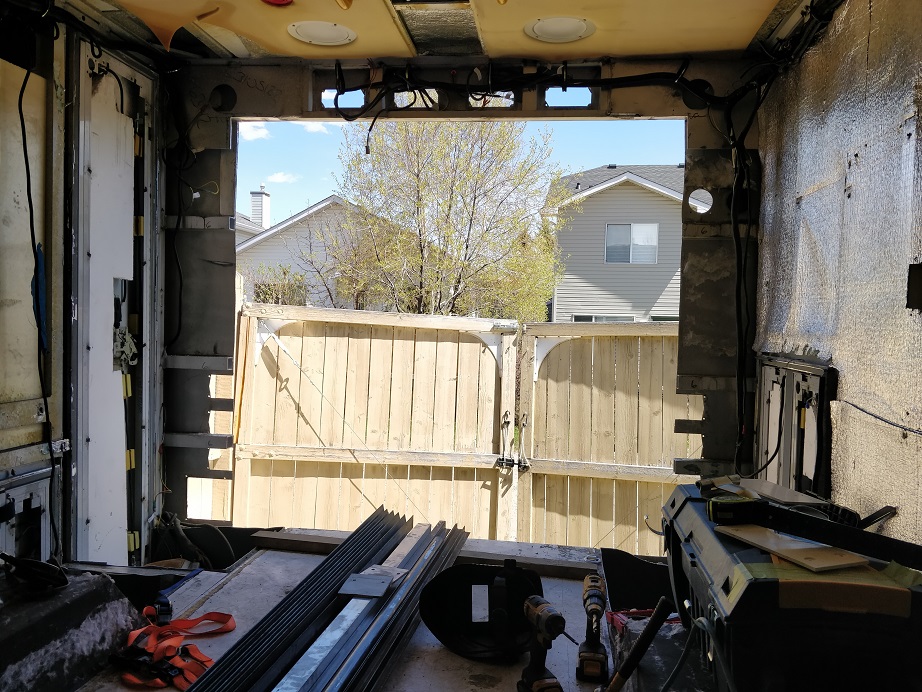
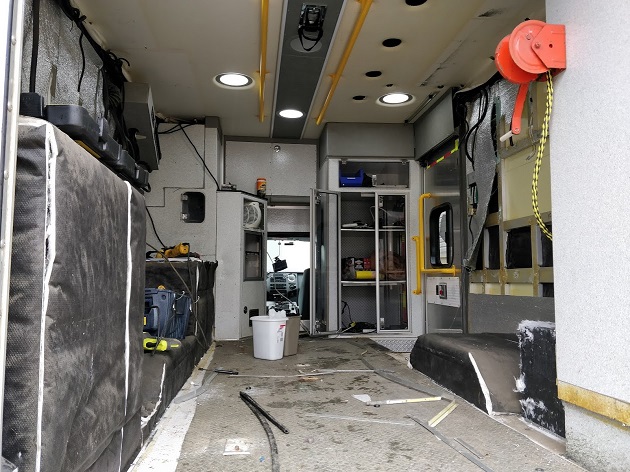
Here's what the interior currently looks like. There are some protrusions from compartments opening to the exterior that I will have cut out next, then patch the floor. I drove the thing over a scale before starting this and it was almost 14k lbs. :shock: Now, the cabinets, counters and everything else I have pulled out so far are all aluminum, but it's all still quite heavy. Everything is built from 1/8" plate. I'm guessing I've removed well over 800 lbs of stuff so far, perhaps more.
Image

So, my next job is to cut out the compartments I mentioned above. Then, I need to widen the rear opening and replace the barn doors with, probably, one large top-hinged door. After that, I plan to build a set of ramps that will permanently sit inside the box and pivot near the back. At the front of the ramps will be a trailer jack and an electric winch. Then I will have some removable ramps that go from the door to the ground, and to load the car I will winch it up the removable ramps onto the raised interior ramps, then use the trailer jack to lower the ramps so the car sits close to level inside.

A list of the interesting things I have found in it so far:
-Fire hydrant wrench
-RF transmitter that might have been a red light changer?
-One IV bag of saline
-One (new) syringe
-One set of scissors for cutting clothing off patients


Top
 Profile  
Reply with quote  
PostPosted: April 19, 2020, 7:32 am 
Offline

Joined: August 28, 2010, 7:53 am
Posts: 343
I did that for my Legends Car about 15-16 years ago. I had a 1979 ford ambulance (Van front end) with a 460 and 4.10 gears (speed limit was 55 back then) The box was really well made, all 1/8 aluminum. I gutted it out. Made a 2 piece rear door that unfolded and doubles as loading ramp. I built ramps that the car sat on in the trailer. The forward 1/2 was level, and the rear 1/2 split the difference between the ramp angle and the forward part. By raising the car, there was lots of room under it for storage

It was super convenient, but the old truck only got 4 mpg. I changed to 3.2X gears which brought it up to 6 mpg. It was titled as a camper (by prior owner) so insurance and registration were really cheap. I sold it to an Italian guy in New Haven that turned it into a pizza catering truck. Your truck looks a lot more sophisticated - should make a great hauler


Top
 Profile  
Reply with quote  
PostPosted: April 20, 2020, 1:04 pm 
Offline
User avatar

Joined: January 11, 2017, 11:06 pm
Posts: 188
Location: Alberta
Oh wow, good to hear that others have done this! Do you have any pictures?

4 MPG sounds painful. Mine also has 4.10 gears but also tall tires, so on the drive home I was pleased to see the engine was under 2000 RPM at 60 MPH. I got about 10 MPG on the drive home. At some point I may look at streamlining the front of it a little, since the tall box above the cab was exactly what I was hoping to avoid.


Top
 Profile  
Reply with quote  
PostPosted: April 20, 2020, 3:10 pm 
Offline
Mid-Engined Maniac

Joined: April 23, 2006, 8:26 pm
Posts: 6422
Location: SoCal
Except that with oil now $2-20 a barrel (really), gas should be pennies a gallon, though we all know the chances of that happening...

_________________
Midlana book: Build this mid-engine Locost!, http://midlana.com/stuff/book/
Kimini book: Designing mid-engine cars using FWD drivetrains
Both available from https://www.lulu.com/


Top
 Profile  
Reply with quote  
PostPosted: April 20, 2020, 5:17 pm 
Offline

Joined: August 28, 2010, 7:53 am
Posts: 343
I dont have any pics that i know of - that was before I-phones. Not only did it have the carbed 460 with 4.10 gears, it also only had a 3 speed auto - no overdrive. The van style doesnt dissipate heat as well as a pickup style, so it would get pretty warm in the cabin on the highway.
The box on mine was 11 feet, so it was also good for picking up building materials, moving a Bridgeport, etc


Top
 Profile  
Reply with quote  
PostPosted: April 21, 2020, 1:04 pm 
Offline

Joined: September 19, 2009, 12:33 pm
Posts: 498
Awesome build, I've frequently dreamed of something like this and occasionally hit up Craigslist to see what's out there.

Since you need a rear door anyways, is there any reason you're not using that as part of the loading ramp?

Image

_________________
Ford 5.0 into an M3
mikaelvroom.com | @MikaelVroom


Top
 Profile  
Reply with quote  
PostPosted: April 21, 2020, 2:00 pm 
Offline
User avatar

Joined: January 11, 2017, 11:06 pm
Posts: 188
Location: Alberta
Well I'm starting to rethink that. Initially I did not consider it because I wanted at least a 12ft ramp, given the height of the floor. The opening is only about 5ft high, but maybe I could make the ramp fold into two sections, one 5ft and the other 7ft?


You do not have the required permissions to view the files attached to this post.


Top
 Profile  
Reply with quote  
PostPosted: April 22, 2020, 8:47 am 
Offline

Joined: April 1, 2010, 10:26 am
Posts: 569
I think using double hinge ramp/doors would be complex and heavy, how about using some foam ramp extensions something like these. then you could use a single ramp door and use the extensions to get the extra ramp length you need because of the high load height.

https://www.raceramps.com/c/trailer/

Graham


Top
 Profile  
Reply with quote  
PostPosted: April 22, 2020, 8:58 am 
Offline
User avatar

Joined: September 22, 2005, 8:12 am
Posts: 1880
Location: 4AGE in S.E. Michigan
If you are going to put in a false floor, you could store ramps under the floor.
Davew


Top
 Profile  
Reply with quote  
PostPosted: April 22, 2020, 12:57 pm 
Offline

Joined: February 8, 2014, 10:47 pm
Posts: 781
Location: Cornelius OR
Put the car in at an angle starting at the bottom of the door and just clearing the rear axle tires and pull it in with a winch.

With a flat floor you will have loading problems due to the low ground clearance of a Locost, long ramps are not a good solution.
You might be able to flatten the floor forward past the rear axle doing ramps that allow clearance for the chassis.
Which could double as bunks or counter space with the car out.

Another way to do it is to make the outside ramp an elevator, like they use on a stacker trailer.
But that would not likely work well with a prebuilt wall unless you are able to add the needed bracing.

_________________
Honey anyone?


Top
 Profile  
Reply with quote  
PostPosted: April 22, 2020, 7:43 pm 
Offline
User avatar

Joined: January 11, 2017, 11:06 pm
Posts: 188
Location: Alberta
Yup that's more or less what I was trying to say in the beginning, with the addition of the internal part then lowering down closer to flat. Who knows, maybe that doesn't matter enough to be worth the extra effort, though.

I took a bit of time to help a friend with something and to work on my mill. The 3/4hp DC motor was losing power badly, so I tossed it in favor of a 2hp AC motor. The belt I ordered ended up being too long, but I have another on the way.

Image

Image


And back to the ambulance. I decided to cut out the compartment that scared me the most, which was the very tall one in the corner. I had to get creative and use a combination of the jigsaw, reciprocating saw and an angle grinder, but I got it out without cutting anything I didn't mean to. When I had everything out but the rearmost part, I tried prying it and to my surprise the stitch welds on the vertical seam all let go. Hopefully those welds were done on a Friday afternoon and the rest.. wasn't. Most of the wiring shown here will disappear, as it's largely for the in-compartment lighting or one large bundle labelled 'spare'.

Image


Top
 Profile  
Reply with quote  
PostPosted: May 16, 2020, 11:43 pm 
Offline
User avatar

Joined: January 11, 2017, 11:06 pm
Posts: 188
Location: Alberta
More progress. Rear doors removed, frame cut out, and a new frame built to fit a new door. This new door is extremely simple, but it's light and does the job. Latches from the inside only, which is how I wanted it. By my math, based on the materials it should weigh just under 150 lbs, and I was surprised to discover that each of the two OEM doors weighed close to 100 lbs.

Anyway, here's what it looked like during the cutting:
Image

And hanging the door:
Image

I did it sort of backwards, where I made the door ahead of time and once it was hung, I started the framing to fit. That way I didn't have a gaping hole in the thing for a day while I built the door to fit the frame. Framing is not quite done yet, but I got it to the point that it would latch and be secure. I think my arms might fall off. I have also ordered some edging with weatherstripping on one side, so it should seal pretty nicely once it's all said and done.

A quick safety reminder, always check your tools before and after using them. I was using my crowbar to salvage a piece of square tube for part of the new frame, and this happened.
Image

One unexpected but very cool side effect of this project is that I have been able to upcycle a bunch of material. Two of the large compartment dividers are going to a friend's greenhouse to act as shelves, along with several dozen feet of aluminum C channel that is now serving as a heat sink for high power LED strip lighting.

I also gave the cabinet frames, lexan panels, strip lighting, two more shelves, a grab handle, and some aluminum plate to a friend who built a very nice enclosure for his CNC machine. It's very gratifying to see some of this stuff put to such good use.
Image


Top
 Profile  
Reply with quote  
PostPosted: May 17, 2020, 6:35 am 
Offline

Joined: August 28, 2010, 7:53 am
Posts: 343
Zig - I made a folding door, but ended up dong it opposite of your pic. The door panel that you could see from the outside was the one attached to the back of the truck. The other was inside that one. I had struts/feet, on the top of the panel facing outward that would set the proper height on the ground.
ie Fold it down, feet hit the ground, then fold the second panel out.
I used pallet racking frame from the scrapyard then covered in aluminum sheet It was very strong and light. There are helper springs you get get on any online trailer supply. This made it an easy, 1 person job, to put the ramp up/down


Top
 Profile  
Reply with quote  
PostPosted: May 17, 2020, 12:38 pm 
Offline
User avatar

Joined: January 11, 2017, 11:06 pm
Posts: 188
Location: Alberta
Oh right, I forgot to address that. I chose to keep the door hinged at the top for a couple reasons. I wanted to be able to back the thing up to a loading dock and make sure it could handle carrying other random cargo. I also noticed while poking around the door frame, that the lower frame is not very well attached to the rest of the box. I was a little surprised to see daylight from between the inside of the frame and the compartment floor when I pried on it. At that point I decided I didn't want to try and beef it up enough to mount the hinges and hold the weight of the door/car. As it is now, I am going to have to change my design for the ramps a bit, need to find a way to support them from further inside the box.


Top
 Profile  
Reply with quote  
PostPosted: May 19, 2020, 8:09 pm 
Offline
User avatar

Joined: January 11, 2017, 11:06 pm
Posts: 188
Location: Alberta
Had to slow down a little over the past couple days due to rain and being kind of burned out, but I have it legal again.

(I don't have enough clecos to do a whole panel)
Image

Both panels in place, and I decided to leave off the diamond plate rear cover
Image

Painted with the same rocker guard as the door, lights reinstalled. To make it easy to align the lights, I 3d printed a little jig to help me out. Each light still had 2 of the original 4 mounting holes visible from the inside, so the jig had pegs that fit into those two holes, then shifted the bolt pattern to where I wanted it.
Image

Image


Top
 Profile  
Reply with quote  
Display posts from previous:  Sort by  
Post new topic Reply to topic  [ 21 posts ]  Go to page 1, 2  Next

All times are UTC - 5 hours [ DST ]


Who is online

Users browsing this forum: No registered users and 15 guests


You cannot post new topics in this forum
You cannot reply to topics in this forum
You cannot edit your posts in this forum
You cannot delete your posts in this forum
You cannot post attachments in this forum

Jump to:  
POWERED_BY