Oh, you are in for a lot of "fun". From the rebuild of my 13B:
Quote:
The biggest chore undertaken, was to attack the engine. This was one of the reasons I chose to go rotary power. I knew the engine needed repair and wanted to use this build to learn about rotary engines. Last weekend, I had 2 buddies over and we tore the engine down. The front eccentric nut was a BIT** to remove. It was originally torqued to only 80-98 ft lbs. Maybe some Loctite was used too. First we tried the impact wrench----nothing. Then we tried a breaker bar --- nothing. Then we tried a 4’ extension on my breaker bar --- I broke two Harbor Freight Impact sockets in the process. I had to resort to buying a new, short impact socket from Sears. It had a thicker wall and didn’t angle off the bolt head as pressure was applied to the bar. That socket, about 5 minutes of Mapp torch and the nut finally succumbed to our perseverance. The rear eccentric nut needed some extra effort. We bought a 2-1/8” socket (3/4” drive) to fit the 54mm metric nut (matched the 54mm within 1 thou). We added heat from the Mapp just in case. We applied the socket, a ½- ¾ adapter, my ½” breaker bar and the 4’ extension and placed a wool blanket over the whole thing in case there was flying pieces. On a personal note, we just about busted a nut. Not the one we wanted to remove from the engine. In the process, the breaker bar’s swivel-end broke in two. There goes a nice breaker bar! The remaining square end embedded itself into the ½-3/4 adapter. So I broke out the MIG and welded the adapter directly to the end of the breaker bar and tried again. We increasingly applied some pressure (about 200-250 lbs) at the end of the extension and rapped the back of the breaker bar with a 2 lb sledge. This time the correct nut finally let loose. It was originally torqued from 289-362 ft lbs!
and
Quote:
the engine was on the HF engine stand using an Atkins adapter plate. My big problem was with the front eccentric nut. The small one! We broke 2 impact sockets in the process. We drilled a 1"x1/8" steel bar to fit across two pressure plate bolts on the flywheel. Inserted a extension tube, and braced it against the engine stand frame. That, a MAPP torch for about 5 minutes on the bolt and a seriously long breaker bar. The front nut is sealed with Loctite and silicone sealant. The heat brakes it down. Of course we covered it all with an old Army blanket to act as a shrapnel blanket if it came to that. Fortunately, it finally succomed. Don't try this with anything but a short 6-point heavy duty impact socket.
Once that was done we attacked the rear nut in a similar process. We only broke 1 breaker bar during that process. The 3/4" drive Sears chrome socket worked well here.
I still have the welded breaker bar in my tool chest as a reminder.

_________________
Chuck.
“Any suspension will work if you don’t let it.” - Colin Chapman
Visit my ongoing MGB Rustoration log:
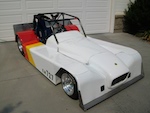
over HEREOr my Wankel powered Locost log :
over HEREAnd don't forget my Cushman Truckster resto Locostusa.com/forums/viewtopic.php?f=36&t=17766