After my last post, I did some more sanding and sprayed it gloss black. I went as fine as 220 before spraying but there were quite a few marks that were visible but very fine and you really couldn't feel. I thought they'd not transfer through to the final finish. Ever been wrong before? Yup...happened to me - it looked terrible.
On top of that, there were several areas that had very thin Bondo. After a few coats of black lacquer, it soaked through and basically melted the foam underneath so I had a bunch of soft spots that couldn't be sanded. The lower left corner in the first pic was the worst area. You can see where the sheets of foam are joined.
I ended up adding another 1/16"-1/8" of Bondo over the top and reshaping and finishing with 220 grit. That part only took about 5 hours; the rest of the time has been shaping the front of the nose around the opening for the grill. I'm hoping to get to round 2 of gloss black tomorrow afternoon after some more sanding (this time with something finer than 220 and all of the marks will be coming out ).
You do not have the required permissions to view the files attached to this post.
Keep it up, I know how frustrating making plugs and molds is, but the reward is worth the effort. Nice wheels, konig feathers? I cant make out the brand of tires?
Yes sir. Someone on the USA7 board got a set in black for their car and that pretty much sold me on that style.
I'm starting out with Dunlop Direzza Z1 Star Specs. I have no idea how they'll do on a light car but allegedly they're a decent tire. Its actually spell "tyre" on the sidewall so they can't be all bad.
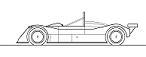
Its getting closer. I just need to add the flange at the back for the hood and an extra 2" at the bottom where it meets the frame and it should be ready for wet sanding and finishing.
You do not have the required permissions to view the files attached to this post.
Since you call it a buck, I thought you were going to pull a mold? The only paint sprayed on the buck would for block sanding, with a light mist to sand off using a foam block or holding the ends of a drywall screen. Green wax, a bottle of pva, and a brush to apply it only costs about $20. It isn't much more work to make a mold and pull a part. Gel coat is cheap too, if you want it.
I'm feeling red with a black "lip" at the front and black fenders right now.
You're correct MV8, I will be pulling a mold from the plug. Wet sanding 600 -> 800 -> 1200 then buffing and polishing to get a high gloss black makes any sort of surface imperfection pretty obvious. My goal is to have to do no finishing work before paint on the final part aside from filling in some of the really really tiny pin holes that form in the resin between the cloth fibers.
chetcpo wrote:Nice. You really do grade A fab work man. You should be proud.
Indeed, great looking build.
You're doing what I have been planning on doing with the pedals which was to have floor mounted brake and firewall mounted throttle.
It'll probably make heal-toe downshifts a lot more comfortable.
The floor mounting of the gas pedal in my M3 is probably the one thing that I really don't like about the car...
Great stuff. Thanks for posting it.
I'm taking the easy way out and going with a modified book pedal box (Haynes Roadster). I hope it will work out. If not, I can fall back to something like you did.
Carroll Smith seemed to really like the over-hanging gas pedal and the floor mounted gas/clutch pedal in either Tune to Win or Prepare to Win (or both) for that reason.
As with everyone on these cars, I figured if it doesn't work out, 10 minutes with an angle grinder and the MIG will fix it.
before you think I'm critisizing I want to say your car is looking absolutely amazing. Love the wheel (I might have to copy)!
The throttle return spring can cause problems when it is pedel mounted like that. If it overpowers the spring on the throttle body it will try to push the cable and if it creates enough slack you can get a loop or kink in the cable. Its much safer to have ALL the throttle return spring mounted at the carborator or throttle body.
Its not fun when a throttle cable breaks inside its housing and the carborator springs aren't strong enough to snap shut by themselves! (motorcycle, previous owner modified)
I got them from http://www.good-win-racing.com. I'd defiently buy from them again. They forgot a set of center caps. The replacements were at my door 3 days after the call.
Hmmm never thought of that. Thanks for the heads up - I'll be sure to keep that in mind when I'm installing the cable. I won't argue that stuck throttles are not enjoyable.
The spring thats on there now is a really soft one from a Lowes multi pack...I was going to go stiffer but you bring up a very very good point. My other option to is go with a push/pull cable and eliminate that risk.
Everytime I convince myself push/pull cables from Morse are too heavy and overkill for throttle, someone goes and reminds me why I've always been a fan of them.
So I *tried* to lay the mold for the nose today. It started off bad and got worse.
To make a long story short, I positioned myself at the entrance to the garage right by the door. The sunlight shining in sped up the curing process and the top of the nose dried before I managed to get it layed.
I figured I could just peel the dried stuff off, respray the PVA, and give it another go. Well after I managed to remove the messed up mold pieces and wash off the remaining PVA, I noticed quite a few cracks and waves in the plug along with some missing paint that resulted from removing the old mold. I've had enough of this - the paint and cracks are a relatively easy fix but the waves aren't.
The only two positive notes are the 1) PVA worked really well and the HF touch up gun does a great job spraying the stuff and 2) the underside of the nose that wasn't layed up in sunlight turned out really nice.
You do not have the required permissions to view the files attached to this post.